If you’re not familiar with Light Painting, I recommend checking out my Beginner’s Light Painting Tutorial. This will teach you the basics of painting with light. Everything we cover in this light brushed portraits tutorial will build upon these basic principals.
But to quickly summarize, Painting with Light is just what it sounds like (see the Light Painting 101 video below). We’ll open our shutter for an extended amount of time and “paint” our scene with a light source. As the artist, we’ll use light like a brush to put more or less emphasis on certain areas of the frame.
Now let’s take light painting a step further using some fun tools and a subject.
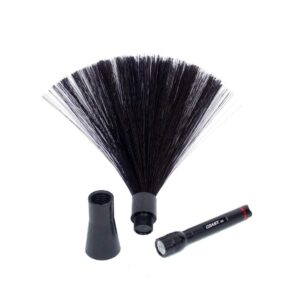
Light Painting Brush
In any art form, tools are an important part of the trade. In order to “Brush” light I purchased a Fiber Optic Brush Kit.These are fairly inexpensive and will act as our paint brush of light. Do a bit of research to find the perfect light brush. Some come with lights built-in, some can be attached to a flashlight or torch you already own.
Fiber Optic Brush Kit
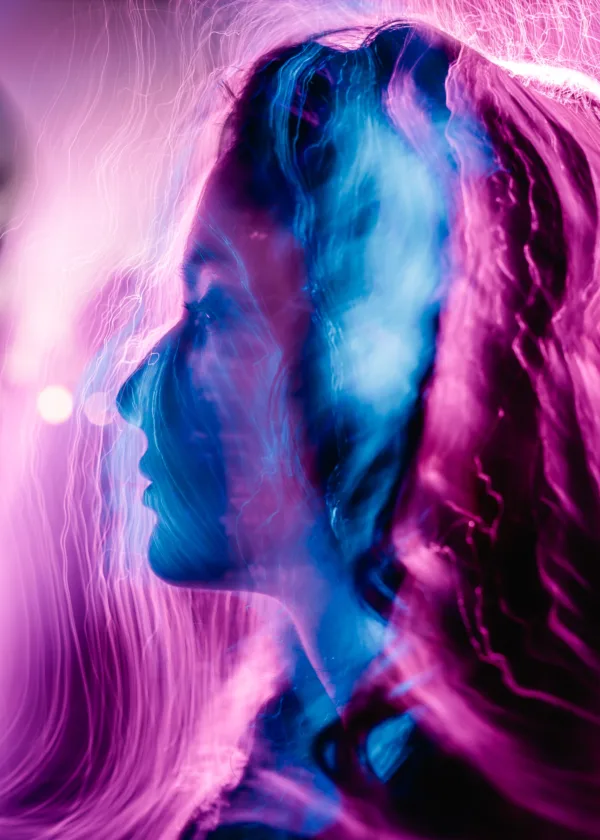
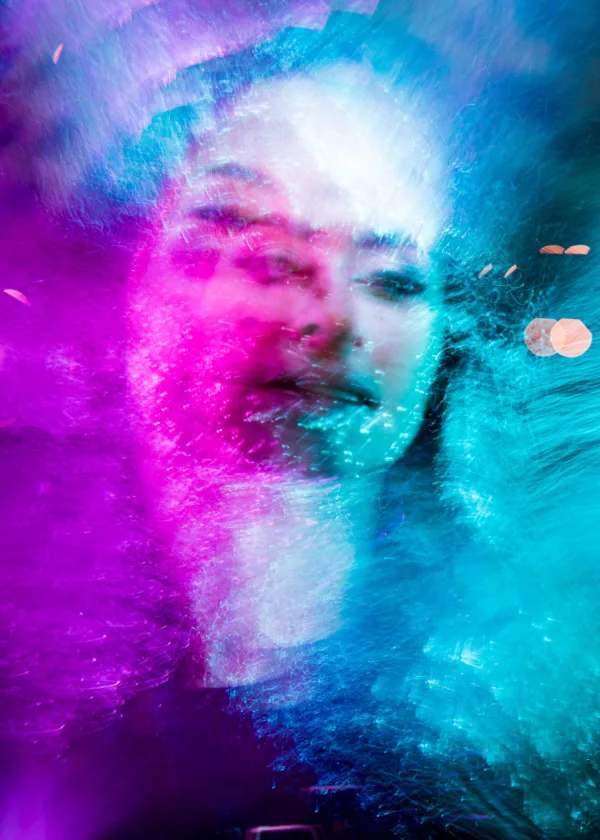
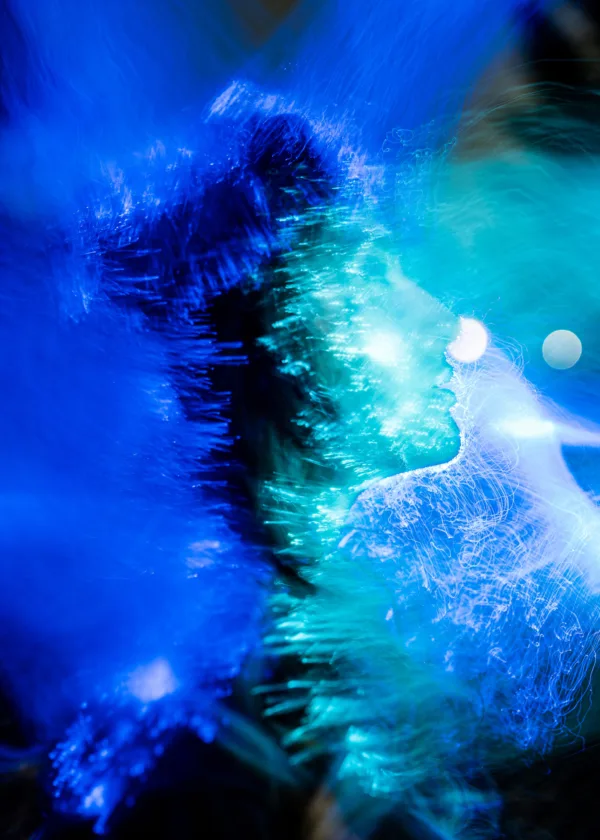
Neon Light Brushed Portraits
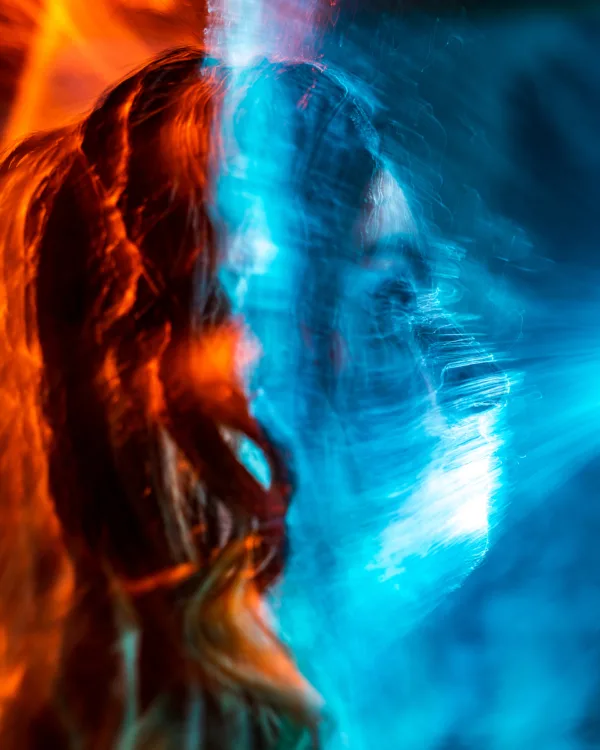
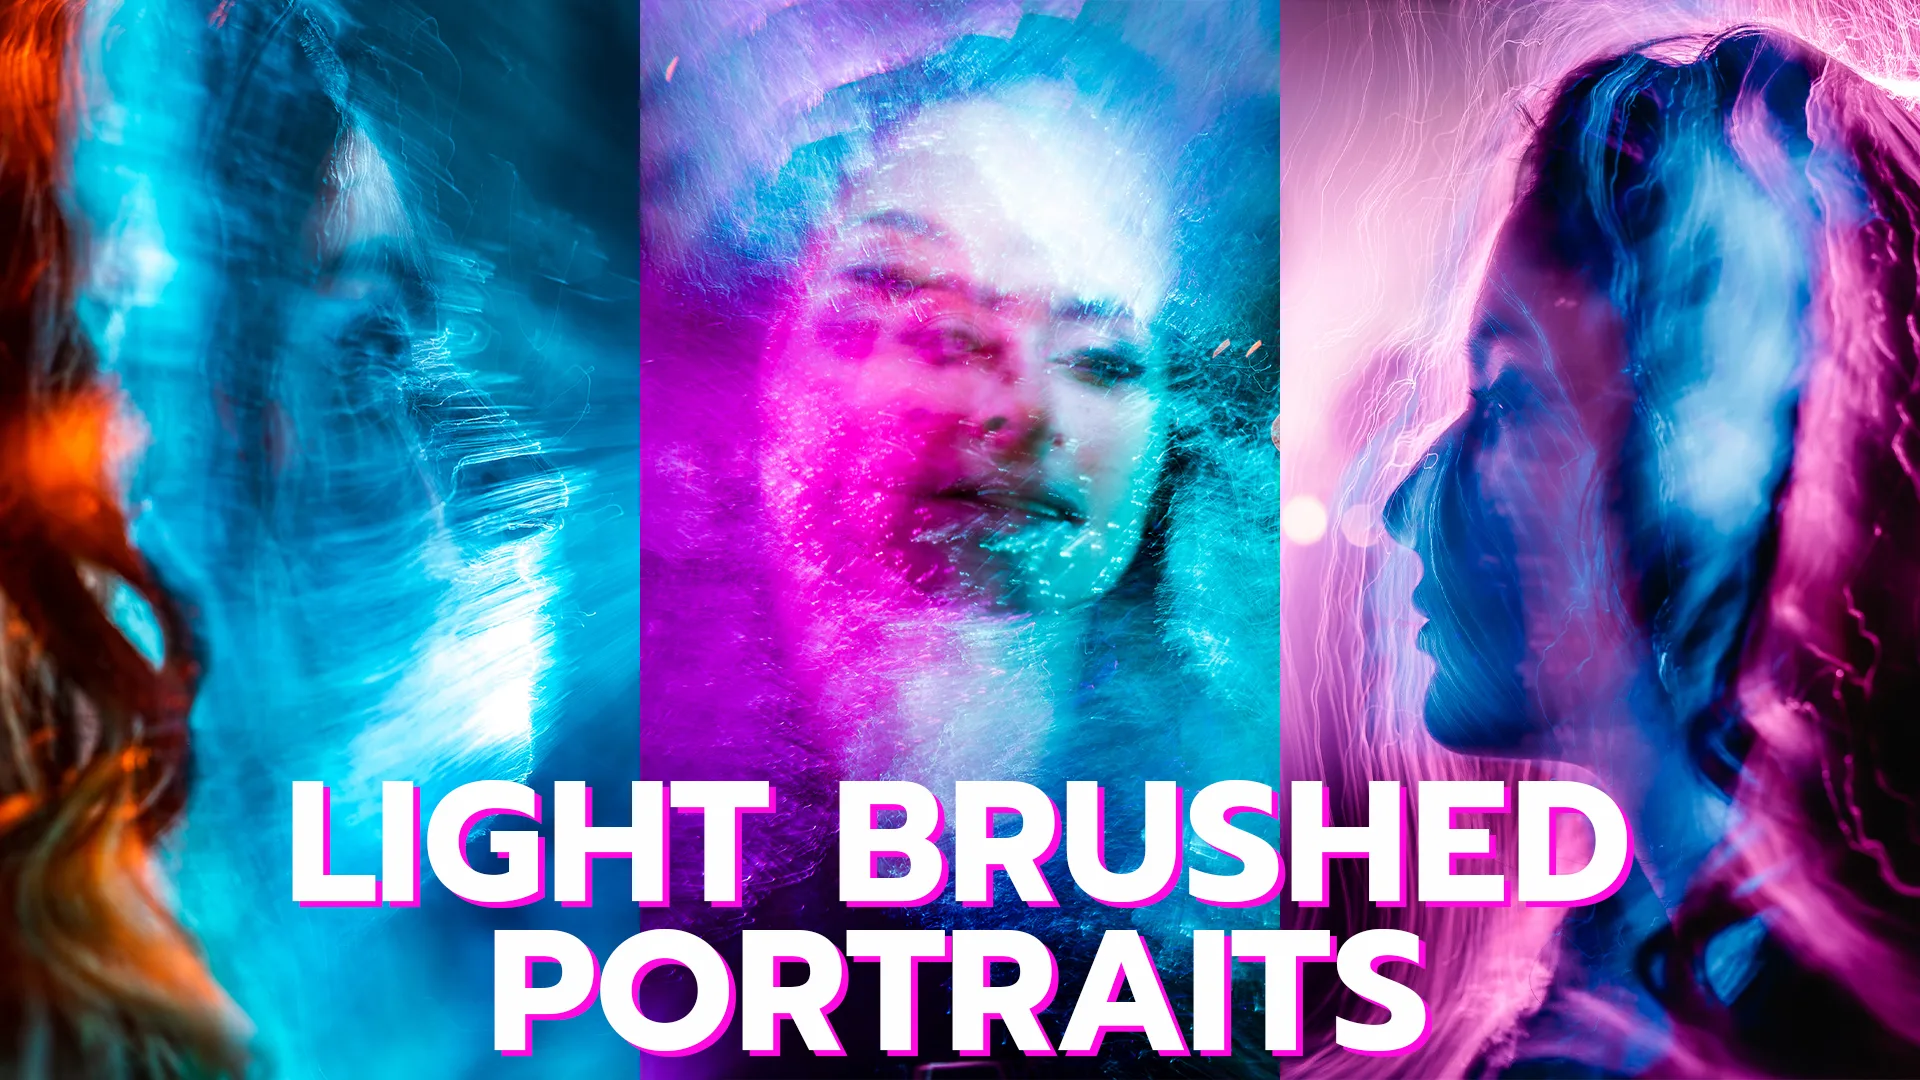
When learning new techniques, it’s important to incorporate your own style into the photograph to truly make it yours. This is what I did with my Neon Light Brushed Portraits — combining the idea of fiber optic light painting with my Neon Portrait style.
I’ve shared some examples below of my first attempts at light painted portraits, and I was blown away by what I was able to create. Each exposure is completely unique, and can’t be replicated. You can truly paint a one-of-a-kind masterpiece with light, with some patience and practice.
So I’m sure you’re asking: How did you do it? How can I paint with light brushes?
Guide to Painting Portraits With Light
If you’ve played with light painting before, you probably have an idea of how I achieved these portraits. Let’s get into the finer details of this technique. You’ll need a light brush, camera on a tripod, and a very patient model.
Camera on a Tripod
Like any other long exposure, your camera must be completely still for this to work. The only movement should be that of your brush. I recommend starting with a 30 second exposure. 30 seconds goes by quite quick, so you may have to use Bulb mode to have enough time to paint your whole subject.
Light Brush Technique
Using your light brush, paint your subject. It’s critical that you communicate with your model before the photoshoot and during the photoshoot. AGAIN, be sure your model is comfortable with being touched by the fiber optic brush before proceeding. Communication goes a long way toward keeping everyone safe, and making great photos.
I attempted to follow the nature contours of the face to emphasize where light and shadow should fall. Don’t over paint your subject. A balance of light and shadow create depth, and you can quickly over do it with too much light.
I recommend starting with a single color and a 30 second exposure. You con always increase the number of colors you paint with and your exposure time. It’s all trial and error, so have fun experimenting!
Model
As I mention earlier, communicate with your model. Ensure they’re okay with being painted with light before you even schedule the shoot. Feel free to show them some of my images so they can understand what you’re looking to achieve.
Now your model is going to need to sit very still. This means no chugging RedBulls before the shoot. Any sort of movement, just like with your camera, will create a blurry image.
Everything is a Remix
Everything in some form or another is borrowed and improved upon. Nothing is truly original.
That being said my parting words are to aspire to be different. Introduce your own style into this technique to keep it fresh. Anyone can Copy & Paste a photograph. I was inspired by another artist who painted objects with fiber optic brushes. I borrowed that technique and applied it to portraits, and infused my style, to further create new works of art. Dare to be unique and memorable in a world of Copy and Paste Photography.