
In-Depth Dehancer Film Plugin Walkthrough
Have you spent countless hours in Photoshop or Lightroom trying to edit your photos to look “cinematic” or more like film?
While PS and LR are great tools, sometimes specific, repeatable tasks are best left up to specialized apps like the Dehancer Film Plugin. It was created by Denis Svinarchuk and Pavel Kosenko, together with Nailya Safarova, the inventor of unique digital interpretation methods for analog image media used in film profile sampling.
In exchange for a honest review (below), Dehancer gave me a copy of their plugin for Photoshop and Lightroom (identical interface) to explore. For a full 26-minute in-depth walk-through of Dehancer Film 2.0 tools and features, check out my video below. We’ll develop a few shots from my Viltrox 35mm Lens Review and test out some of my favorite features.
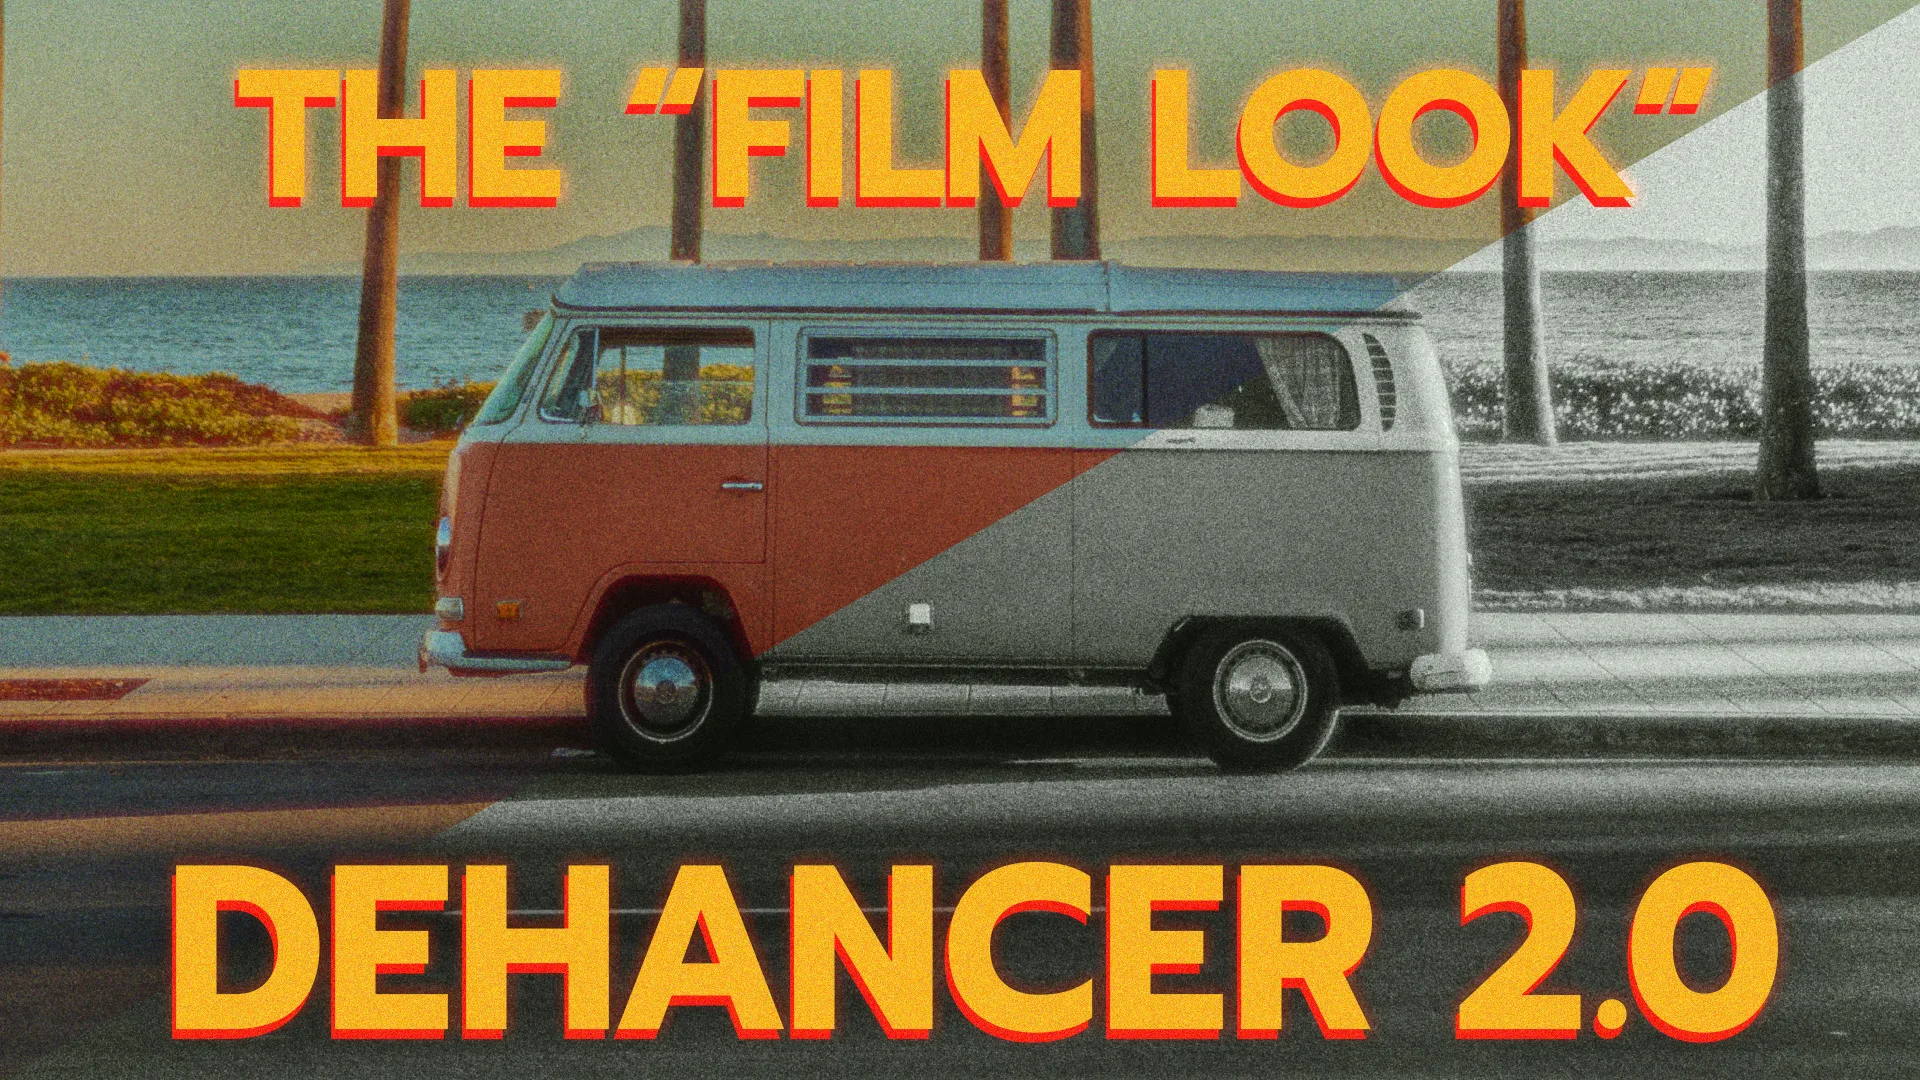
The “Film Look” – Getting Cinematic Photo Edits
While I am quite over the term “cinematic” being misused by YouTube Photographers and Filmmakers, I’m comfortable using it to describe the images I’m getting from the Dehancer plugin. Here’s why this plugin is so useful for me, and why you’ll enjoy it too.
If you’ve ever seen a movie in theaters that was shot on film, or compared film and digital photography, you’ll know there are some obvious and some subtle differences. Sharpness, color reproduction, grain and bloom are just a few of the common examples. Film has a certain character and life to it, that’s lost when using a digital sensor — and each film stock has their own characteristics that make it special.
Dehancer Film has built in Film Profiles for some of today’s popular film stocks like CineStill 800T, Lomochrome Purple, or Kodak Portra 800, and many others if you’re looking to replicate a common look. There are also a ton of film stock I’ve never shot or even heard of, that actually make me want to give that film a try, like Kodak Aerocolor IV 125.
Use my code: RUNNGUNPHOTO for 10% Off the Dehancer Film Plugin now.
Buy the Dehancer Film 2.0 Plugin for Photoshop and Lightroom.

My “Dehanced” Photos
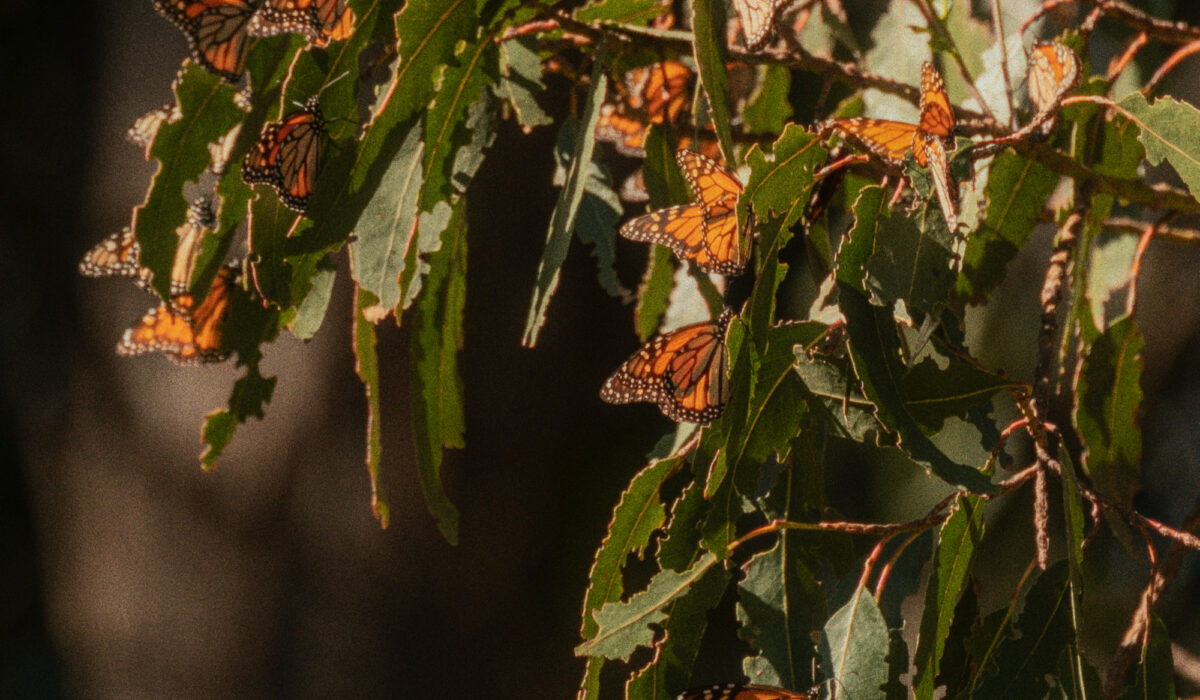
When I was previously processing my images from visiting the Butterfly Grove near Pismo Beach, CA., there was something I just wasn’t loving. At the time, I couldn’t put my finger on it, but they felt almost too sharp — often a complaint film photographers make about digital.
As an experiment, I re-processed a handful of images from that beach vacation and was pleasantly surprised at the result! Adding some subtle glow (using Bloom and Halation) and some film grain, really gave these shots the life that they deserved, since Dehancer is more than just a color LUT.
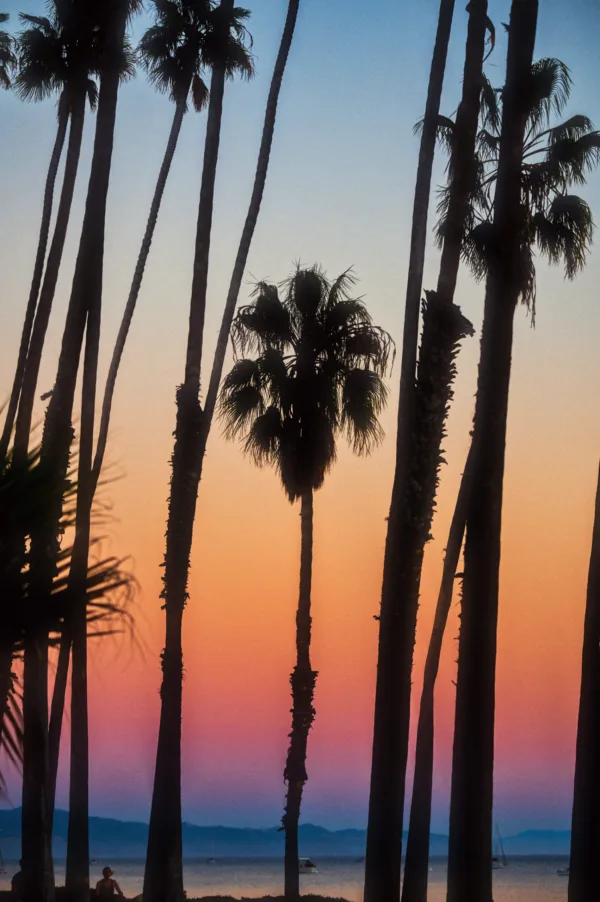
And of course, I went and re-edited most, if not all, of my favorite shots from that trip, including some sunset shots that I’ll be getting printed now. So to summarize some of Dehancer’s features…
Top Dehancer Film Plugin Features:
• 63 Film Profiles with Print Options
• Kodak 2383 Print
• CMY Color Head
• Film Grain
• Bloom
• Halation
• Defringe
• Vignette
• User Presets
As mentioned above, in addition to Dehancer Film’s film profiles, you can also create and save your own “film looks” as Presets. Whether you’re trying to recreate a film stock that already exists or your own personalized look, this is an awesome feature.
Dehancer Film Trial Offer
If you’re not quite ready to buy the Photoshop or Lightroom plugin just yet, Dehancer does offer a trial with a watermark. I highly recommend at least giving it a try with your favorite shots to see what you can come up with.
Drop me a comment below to let me know what you think about Dehancer Film 2.0. I’m also working on a review of Dehancer’s Pro OFX plugin for DaVinci Resolve, which will be coming soon!