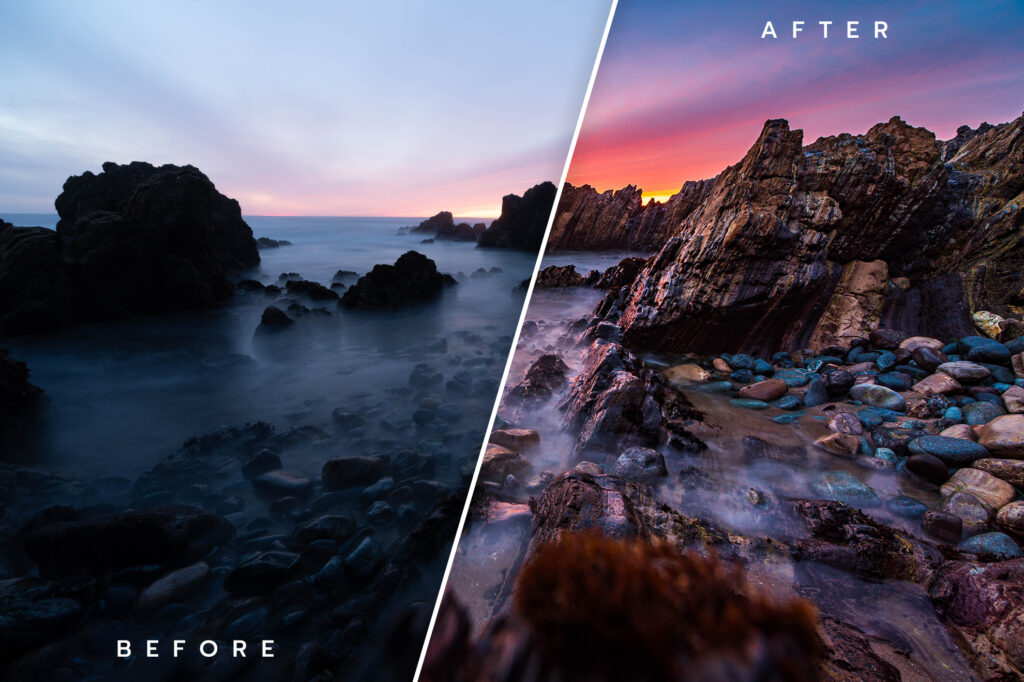
In this Lightroom Classic editing tutorial, we’re turning a single underwhelming looking exposure into a stellar Sunset! Feel free to open up your own sunset photographs if you’d like to follow along. Throughout this article I’ll be sharing screen grabs for you to see my Lightroom settings. Of course your image will be a bit different, so you settings will vary a bit. If you’re a listener, feel free to let the video roll while you edit, or follow along and see my process.
Let’s hop right in to it!
Color Calibration
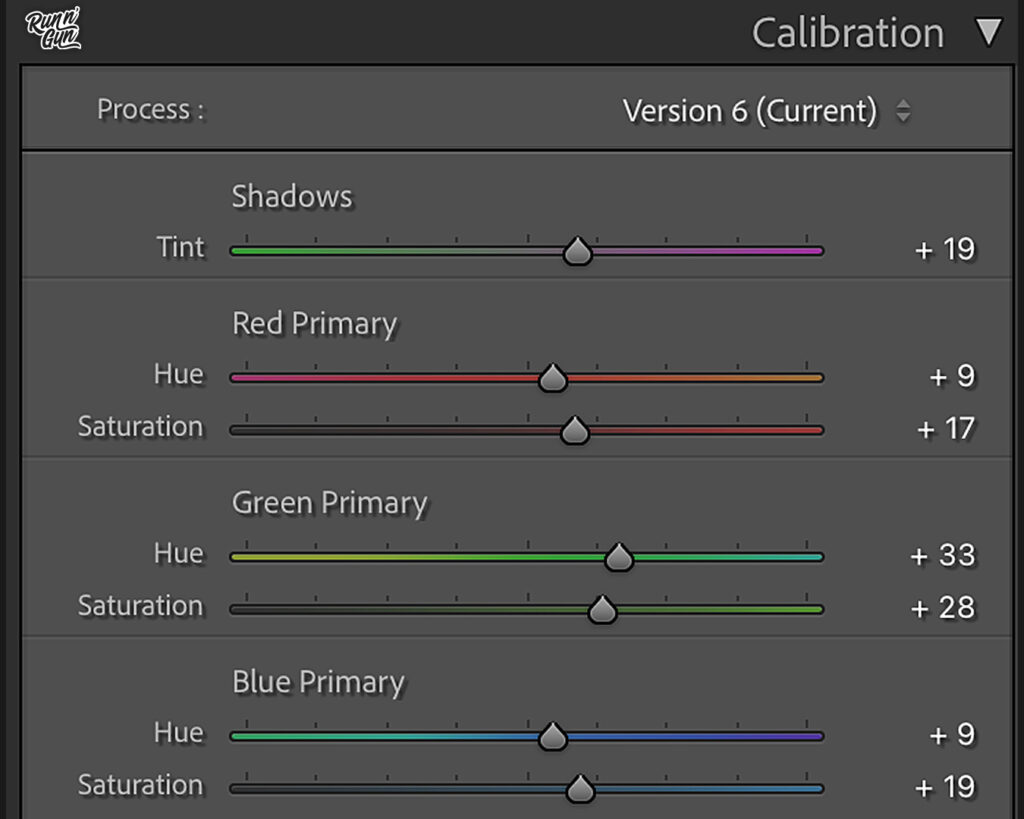
One of my favorite tabs in Lightroom is Color Calibration. The edits I make now will be subtle — almost invisible — but you’ll see them at the end. Like most of Lightroom’s sliders, a little can go a long way. Again, don’t go too far. We’ll come back to this tab at the end to see the important hue changes.
Color Calibration Tab for Sunset Edit (Run N Gun Photography)
Basic Toning
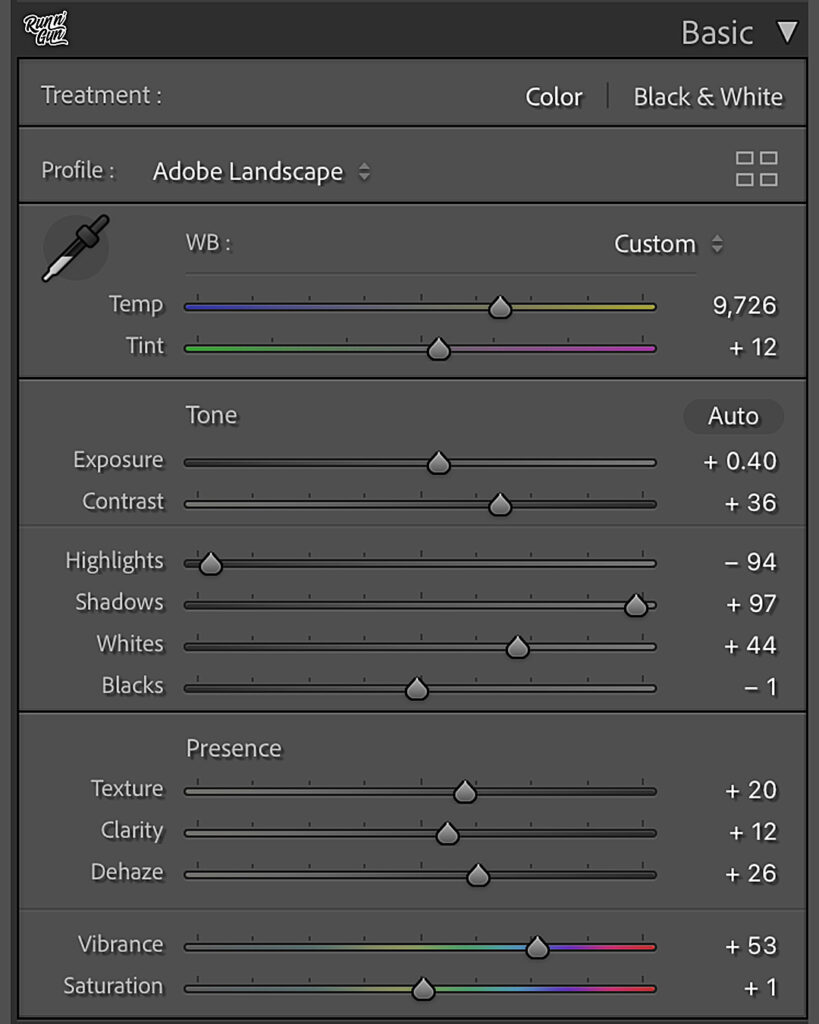
This is the meat and potatoes of our edit. It’s crucial to shoot in RAW, or your image will begin to fall apart in the toning process. I typically start by changing my Color Profile to Landscape. It gives me a good amount of contrast and saturation to start with. You’ll need to decide how warm or cool of a Color Temperature you’d like your sunset or sunrise to have.
From there I will open up the shadows and recover some highlight detail. When it comes to your Presence sliders, be cautious. It’s quite easy to push them too far into an unrealistic look. If I need more color I always start with Vibrance, and typically leave Saturation alone.
Basic Sunset Toning in Lightroom (Run N Gun Photography)
Hue, Saturation, Luminance
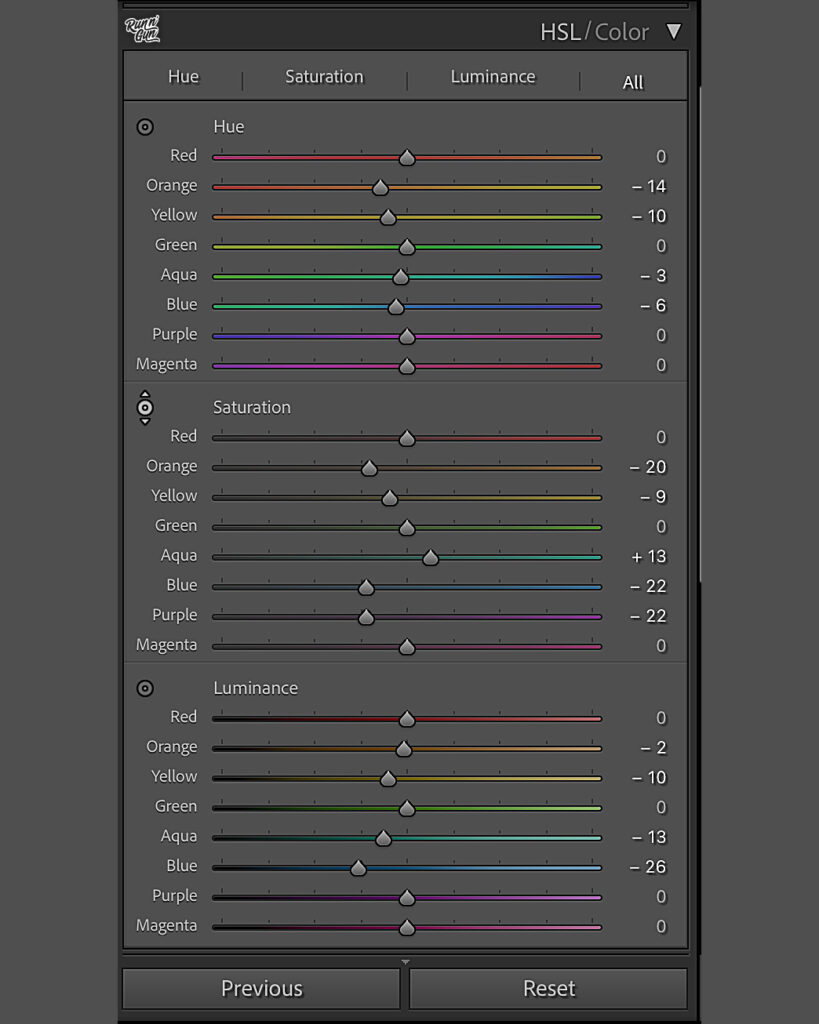
The HSL Tab is another favorite of mine. I absolutely love the Targeted Adjustment Tool (you can see it better in the video). It’s a simple click and drag to adjust Hue, Saturation or Luminance. Subtle changes are your friend! I suggest frequently turning the effect on and off (eyeball) to see the before and after of your edits. Don’t go too far and over-cook your colors.
HSL Tab for Sunset Edit in Lightroom (Run N Gun Photography)
Wrapping Up the Sunset Edit
We’ll wrap up this Lightroom edit with some subtle Sharpening and Noise Reduction in the Details Tab. This is 100% up to you as the artist. You may also chose to apply Lens Corrections if your lens vignettes or distorts your photograph too heavily. Lastly, let’s go back to our Calibration Tab. Turn the little eyeball on and off to see the before and after. Pretty cool right? If it’s too much or not enough, feel free to make some final calibration adjustments now.
If you found this tutorial valuable, be sure to Subscribe to the Blog (below) and the Run N Gun Photography Youtube Channel! Until next time, get out and go shoot!
Want to Learn More About Lightroom?
Unlock your full editing potential FREE 30 Days of Lightroom Masterclass. With 30 micro lessons, you’ll learn everything you need to know to take you from an absolute beginner to a Lightroom Master.