Feeling discouraged by your photography lately? Not making the progress you expected? The good news is, it’s completely normal — all photographers grow at different rates and hit speed bumps along the way. When I teach new photographers, I see a lot of common, simple mistakes So, here are 10 reasons why your photos suck, and more importantly, how to fix them!
10 Reasons Why Your Photos Suck..And How to Fix Them
First we must identify WHY your photos suck before we can fix them. Most of this list is bad habits or techniques that can easily be solved with intentionality and a bit of practice. A couple will actually require you to do less work, instead of more. And as always, you have the option of watching the video or reading the article depending on what kind of learning style suits you best.
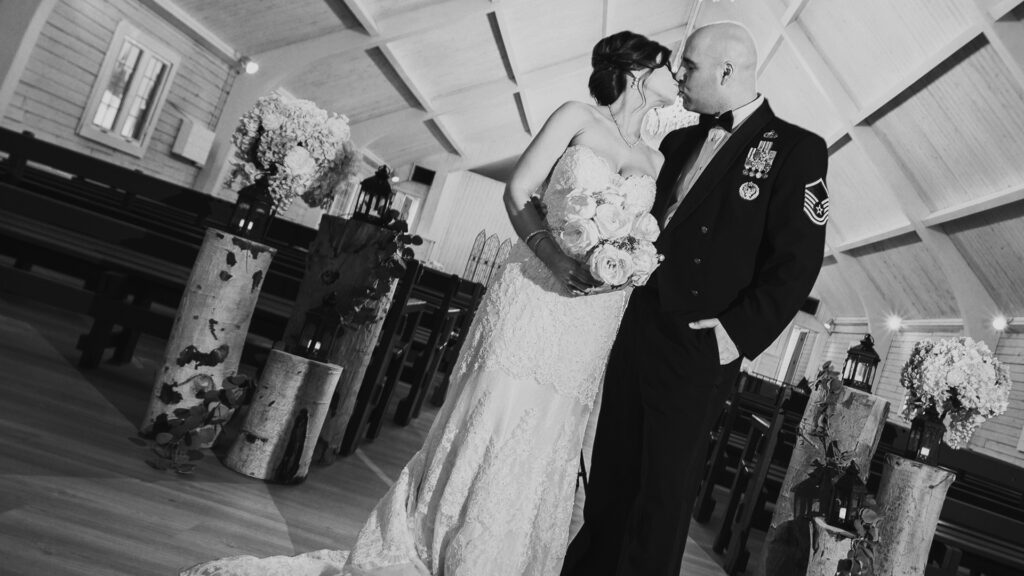
Wedding with a Dutch Tilt = BAD (Run N Gun Photography
1. Crooked Horizon
Stop! Don’t press that shutter button just yet. Take a breath, compose your shot… then for the love of all that is holy, level the horizon in your viewfinder! A tilted composition is probably the number one mistake I see in rookie photographers’ portfolios. This is because your horizon should be level unless you have a damn good reason why.
However, you can tilt your horizon if you know why you’re doing it. And no, it won’t spice up a boring photo. There is a technique called a Dutch Tilt, which is a cinematography term. A Dutch Tilt is used to add suspense and drama to scene. It’s not something you want to start throwing into your Wedding Photography portfolio because it looks interesting. Overall, know the rules of photography so you’re confident when to break them for the right reasons.
Purposefully bad "HDR" Overcooked photo of a barn in Michigan (Run N Gun Photography)
2. Deep Fried Edits
Unfortunately, over-editing a bad photo will not make it any better. However, it can make it worse, so much worse. That’s why it’s important to get as close to the image you want, in-camera. If the shot is out of focus, it’s gone and there’s no amount of sharpening or AI trickery that will save it.
But don’t worry, even professional photographers over edit their photographs sometimes. It’s important to step away from your screen regularly and give your eyes some rest. Toggle back and forth between the before and after to get some perspective on if you’ve pushed the edit a little too far.
If your editing sucks and you’re looking for some good Lightroom tutorials, check out my Free Lightroom Classic Masterclass, 30 Days of Lightroom. I can guarantee you’ll take your editing to the next level, and your editing will suck less if you follow along with my lessons.
Shutter Streaking on a long exposure of Downtown Nashville (Run N Gun Photography)
3. Wrong Shutter Speed
Pay attention to your shutter speed at all times. Nothing quite kills the moment like realizing you missed a shot because your shutter speed was too slow. It’s happened to all of us, especially when shooting hand-held in low light situations. Again shutter streaking can’t be fixed later in Photoshop.
The obvious answer to avoid a blurry image is to use a tripod. However, we don’t always have the luxury of a tripod on ever photoshoot. I prefer to use the Reciprocal Rule when I have to go hand-held. Simply put, your shutter speed should be at least 1/Focal Length. For example, if you’re shooting on a 50mm lens, your shutter should be at least 1/50th. If you’re shooting at 200mm, your shutter should be 1/200th, at a minimum.
High ISO photo of a neon sign (Run N Gun Photography)
4. Too High of an ISO
We all love to push our ISO as high as we can get away with in low-light situations. But, higher ISO values will make your photos more noisy. Additionally, the noisier your image gets, the more you lose fine detail. Camera technology today is amazing, but your camera still needs light — feed it light and you AND your camera will be happier.
The best way to fix this problem is to obviously add more light to your scene. Add a strobe or even just a continuous light; heck sometimes the light on your phone will do the trick! Just remember photography is all about light, and your camera is just a tool to capture light. Overall, if the scene is too dark, your photos will likely be too dark as well.
Focus is easily missed below F/2.0 (Run N Gun Photography)
5. Too Shallow Depth of Field
Depth of field is a fantastic tool for narrowing the focus of your composition. However, it’s easy to get carried away with razor-thin focus. Many photographers buy a “fast” lens that opens up to f/1.2, f/1.4 or f/1.8, and only shoot wide open. Just because you can, doesn’t mean you should! It’s all too easy to miss focus at aperture values lower than f/2, and these lenses are quite soft wide open.
To save yourself the headache of wondering why you have hundreds of blurry photos later, stop down your lens to f/2, f/2.8 or even f/4. Generally speaking, your lens probably shouldn’t be wide open for the entire photoshoot. Experiment with your lenses to find the aperture values at which they perform best. Generally speaking, that’s around f/4 to f/8.
The color and dynamic range difference of shooting in RAW vs JPG (Run N Gun Photography)
6. Shooting JPG Only
Oh the great debate of RAW vs. JPG. Photography “purists” and pixel-peepers will argue until the end of time about which is supposedly better. But, since we don’t have the time for that nonsense, I’ll just give you the facts. If you want to edit your images later, such as sharpening, adding contrast, fixing white balance, adjusting exposure, etc. — Shoot RAW.
If you want to publish directly to social media or quickly share images with your friend and not have to worry about editing, I recommend shooting RAW + JPG. You can quickly share your jpg images AND have the option to edit your shots in full detail later.
Shot at 24mm. Is it too wide? You tell me! (Run N Gun Photography)
7. Shooting Too Wide
“If your pictures aren’t good enough, you’re not close enough.” This famous photography quote by Robert Capa should live in the back of your mind. All too many rookie photographers shoot wide and crop later. However, this isn’t a good technique for getting good photographs. Actually, quite the opposite, your photos will probably suck.
Photograph with intention and when in doubt, get closer! Fill the frame. To this point, that doesn’t mean you cannot have any negative space. Maybe your frame is filled with negative space and your subject is small, showing loneliness. Technically speaking, you’ve filled your frame and told a story.
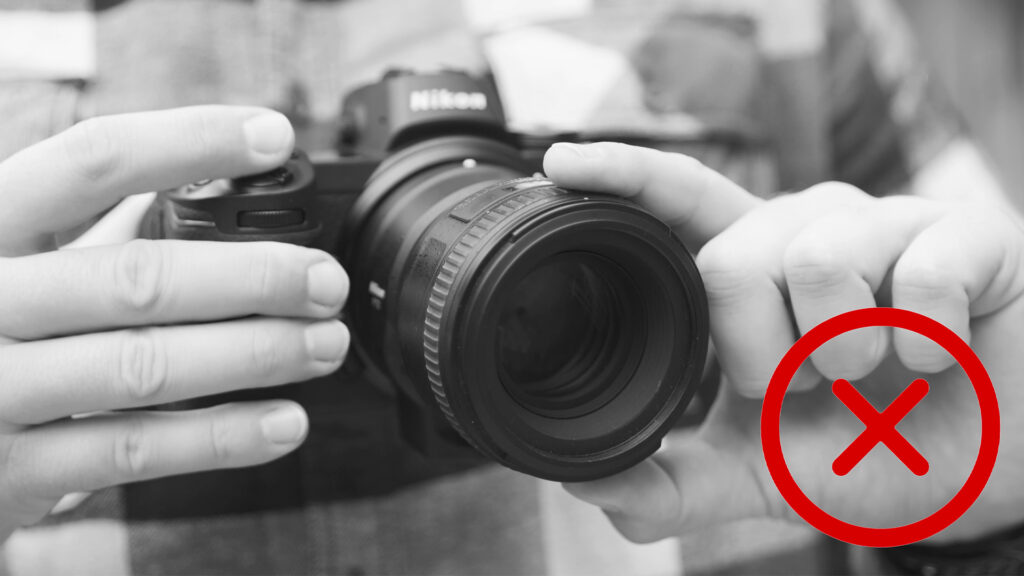
Only chumps hold their cameras like this. (Run N Gun Photography)
8. Not supporting your lens and slapping the shutter.
This next one truly grinds my gears when I see new photographers in the wild. If you’re not properly supporting your camera, not only do you look like a muppet with flailing limbs, but you’re introducing extra camera-shake into your images. I can promise you that your photos are probably sucking … a lot.
Support your camera lens! Get solid grip on your camera body with your right hand, and support the lens from below with your left hand. Additionally, a smooth squeeze of the shutter button will make a huge difference in the sharpness of your photographs.
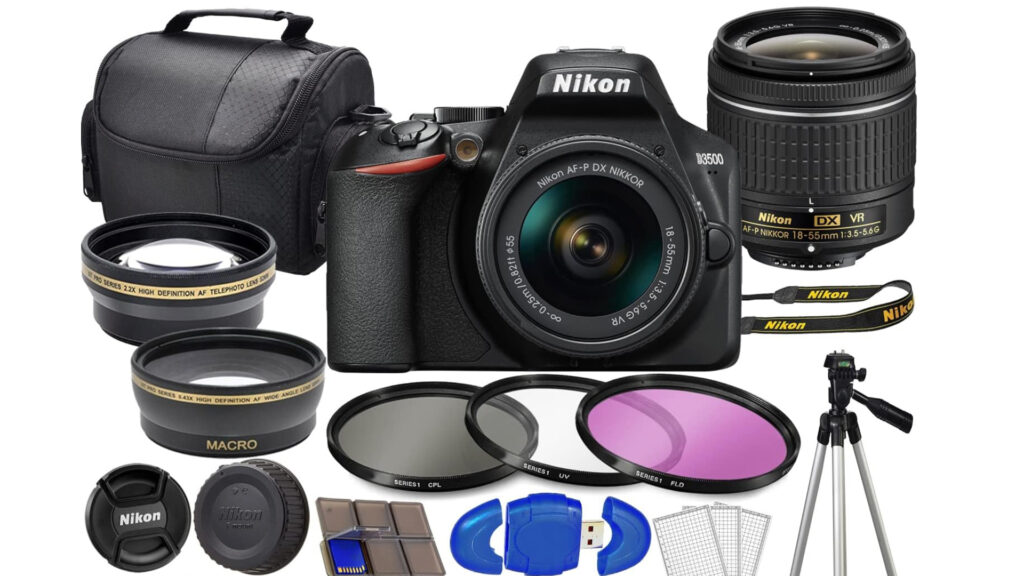
The grab-bag of bundled camera kit garbage. Don't buy it!
9. Buying Cheap Glass aka The Kit Lens
If you’ve ever shopped online for a camera, you’ve seen the big bundles that come with filters, card readers and other random accessories. However, most of what comes in these bundles is cheap junk; don’t buy it.
Additionally, a kit lens may be why your photos suck. Kit lenses are typically cheaper lenses included in camera bundles. While they may be made by a reputable brand, you will never get the most out of your camera. When a new photographer asks me “what camera should I buy for better photos,” a new lens is almost always the answer. There are lenses that cost anywhere from $100 to $1,000, or even $10,000 and there’s good reason why. You will notice a massive difference in build quality AND photo quality.
Direct, on-camera flash. Not a vibe. (Run N Gun Photography)
10. On-Camera Flash
This is a bad one. So bad it’s actually made a comeback as it’s own style, like skinny bell bottom jeans. The only reason to use your built-in flash is because you want bad photos… erm, I mean this “look.” However, if you’re like me and you don’t want your photos to suck, let’s fix this!
The first step is to get an external flash unit. I recommend getting a Nikon flash if you own a Nikon, a Canon flash if you own a Canon, etc. However, I have heard great things about GODOX Camera Flashes, in terms of quality and interoperability between most camera brands. (Don’t shoot the messenger, I’ll review one soon).
My biggest tip is to bounce the flash off a ceiling or wall — never shoot with direct flash. If you can add a light modifier like a soft box, even better! You can see the massive difference between the two examples; the direct, on-camera flash (above) and the bounced flash (below).
Flash bounced off a ceiling, creating a soft, even ambient light. (Run N Gun Photography)
Conclusion: Why Your Photos Suck
Bad photos can quite often be fixed with simple adjustments to your technique or workflow. If we can pin-point why your photos suck (I say this with love), it’s much easier to make small adjustment which can result in a massive improvement to your photography game.
If you enjoyed this article about why your photos suck and how to improve them, please subscribe to the blog updates, below. Additionally, be sure to subscribe to my Run N Gun Photography Channel. And until next time, get out and go shoot!