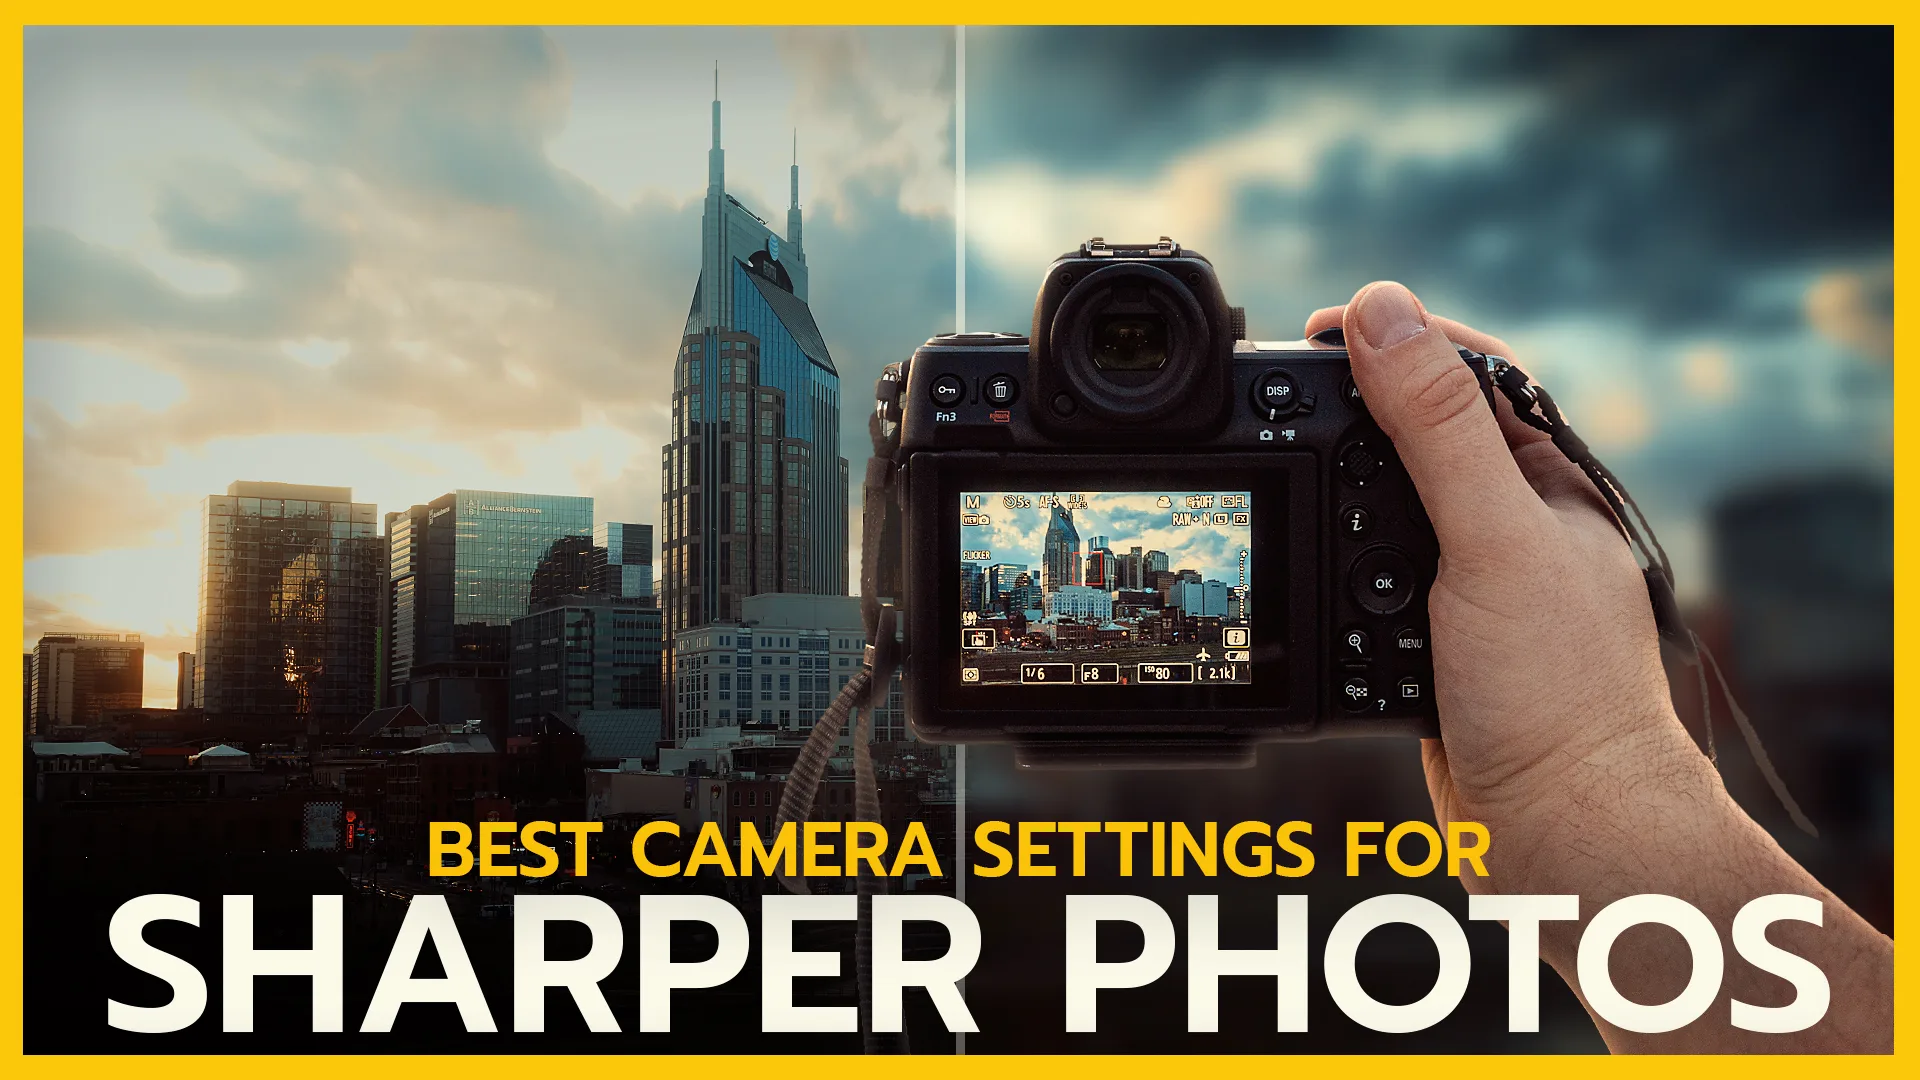
What are the Best Camera Settings for Sharper Photos?
Do all of your photos come out blurry? Are you struggling to get the clearest shots out of your camera? You’re in the right place! Today I’m sharing my top 10 setting for sharper photos!
Additionally, we’ll discuss how your camera sees light, and why your images may be less clear than you expect. So, let’s hop right into this Photography 101 tutorial!
10 Camera Settings for Sharper Photos
Before we dive into this tutorial, I think it’s a good idea to have a basic understanding of Exposure and how your Aperture, Shutter Speed and ISO work together. If you’d like a refresher, check out Mastering Manual Photography Settings, before moving on. Otherwise, here are my top 10 Camera Settings for Sharper Photos.
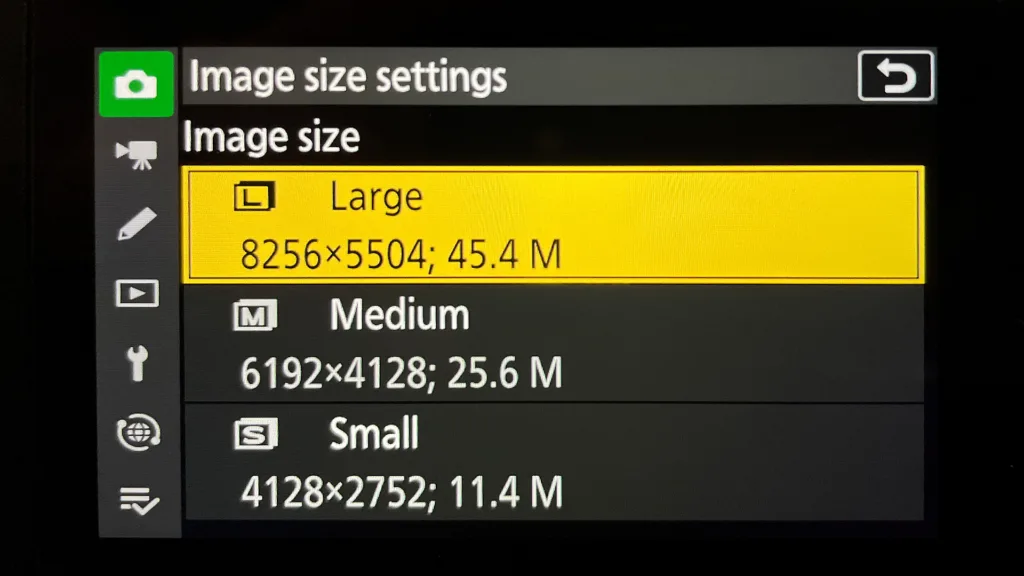
Image Size Setting in Nikon Z8 Camera Menu (Run N Gun Photography)
1. Capturing Full Resolution
Are you shooting at the highest resolution your camera supports? Many people don’t know that their DSLRs or Mirrorless cameras have the option of shooting Large, Medium and Small (resolution) photos! More resolution means more pixels and more detail is being captured. Shooting in the highest resolution is the first setting to change to ensure you’re starting with the sharpest photos possible.
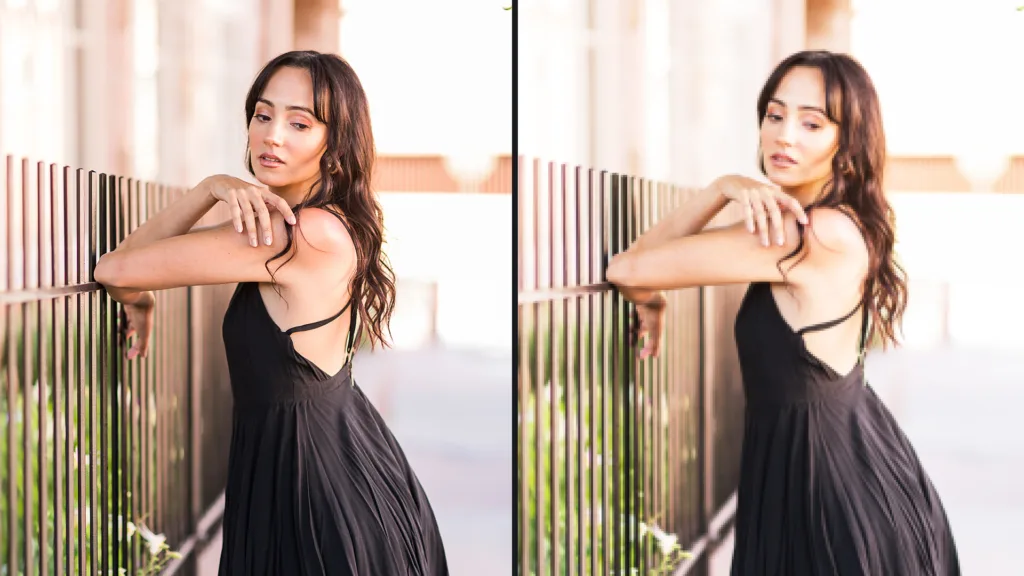
Sharp RAW file vs. compressed JPG file. (Run N Gun Photography)
2. Shoot RAW!
I’ll say it again — shoot RAW! Ensure you’re capturing RAW. There’s a world of difference between RAW and JPG. For starters, JPG is a HIGHLY compressed, lossy format. This means your camera is throwing a lot of image data away to make the file size smaller. I recommend turning on RAW + JPG, which gives you the option to have a sharp master file, and a compressed image to quickly share.
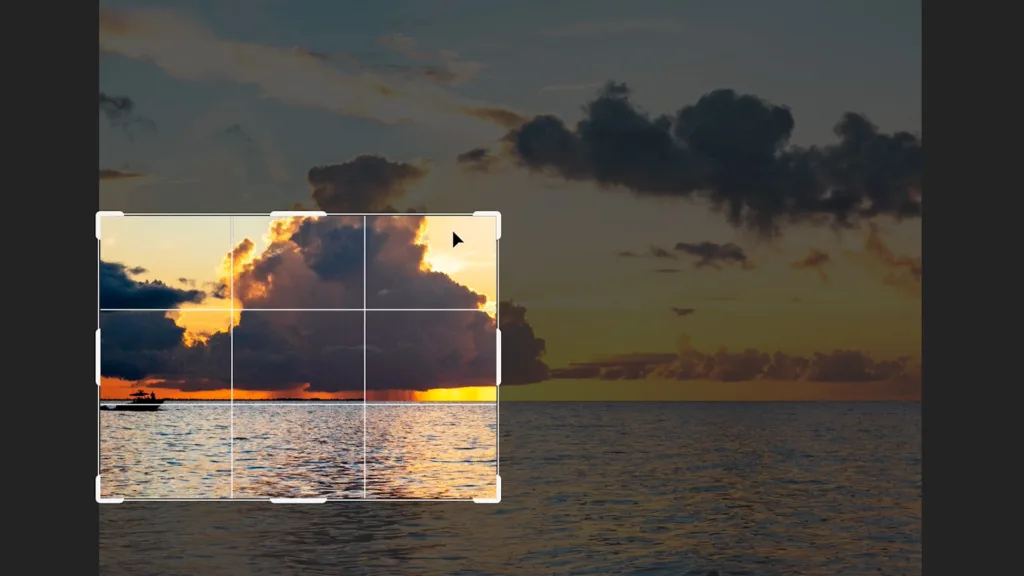
Post-production cropping lowers photo resolution. (Run N Gun Photography)
3. Crop in Camera
When you crop your photos after shooting, you’re deleting pixels. Overall, your making the total width and height of your image smaller, thus a lower resolution and less detail Try your best to get your compositing right in-camera for sharper photos. This means using the right focal setting for the shot.
Underexposed photo, exposure raised in Photoshop. (Run N Gun Photography)
4. Proper Exposure
Get your exposure right in-camera! I can’t stress this one enough. You will lose a ton of clarity and sharpness if you underexpose your photo and try to salvage it later in post-production. Properly expose for your subject and ensure you’re giving your sensor enough light to take a sharp photograph.
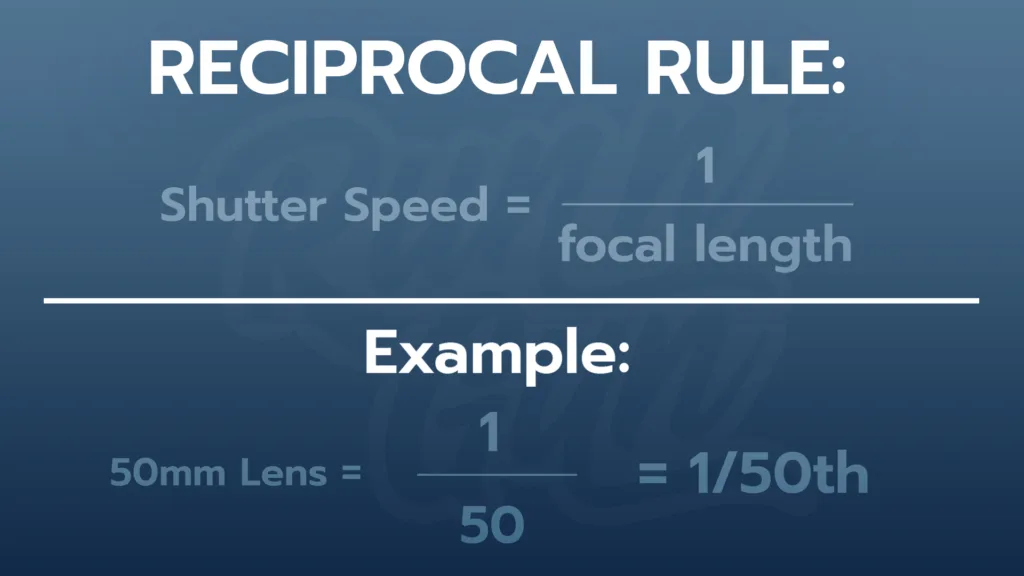
The Reciprocal Rule of Photography (Run N Gun Photography)
5. Best Shutter Speed
To achieve sharper photos, it’s critical to use the best shutter speed for the situation. A pro tips for shooting hand-held is to remember the Reciprocal Rule. The rule states that the slowest shutter speed for shooting photos hand held is the reciprocal of the focal length. This equates to the fraction: 1 over your focal length.
So, if for example you’re shooting on a 50mm lens, the reciprocal would be 1/50. Thus, your minimum shutter speed should be 1/50th. If your using a 200mm lens, the reciprocal is 1/200. You guessed it, your minimum shutter speed should be at least 1/200th of a second.
6. Clean Lens & Sensor
Automatic sensor cleaning is an easy setting you can turn on right now for sharper photos. In your camera’s settings, you’ll typically have the option of auto-sensor cleaning at startup and or shutdown. There is no real difference between the two options. This will help get tiny pieces of dust from sticking to your sensor. However, it may not solve all of your issues. If the dust and dirt persists, take your camera to a professional to be properly serviced.
A higher ISO setting will cause more noise and less sharpness. (Run N Gun Photography)
7. Low ISO
Yes, camera sensors are continuously getting better. However, that doesn’t mean you should be doing all of your photoshoots in a dark closet, under a blanket, at ISO 100,000 with zero light. Low-light capabilities are not an excuse for photographers to use poor lighting. If you’re having to push your ISO above, 1250 or 1600, you need to be giving your sensor more light. This is one of the easiest camera settings to change to get sharper photos. Keep your ISO low!
The aperture of a 50mm lens on my Nikon Z8 camera. (Run N Gun Photography)
8. Stop Stopping-Down
It’s common knowledge that as we close our aperture, more of our image is in focus. This principle is known as depth of field. However, you can take this setting too far! Shooting at an aperture value of F/22, F/32 or F/44 will cause your overall image to lose sharpness and have a soft look.
Why does a smaller aperture make my image blurry? Science! This is caused by diffraction (which I’ll do a whole video on soon), which is different from depth of field. If your aperture is too small, light rays struggle to get to your sensor to get the sharpest photo.
All you need to know is that your lens’s optimal performance will probably be roughly between f/5.6 to f/8. That will provide a large depth of field and the least diffraction.
Nikon Z8 AF-area focusing modes and AF subject detection options. (Run N Gun Photography)
9. Focus Modes
Be sure that you understand what your camera’s focusing modes are, and how they’re used to achieve sharper photos. Most DSLRs and Mirrorless cameras give you the option to change your Focus Mode and AF Area. Additionally, some even have extra autofocus capabilities like subject detection.
We have different modes for a reason. So, it’s important that you use the right mode for the right situation. For example, you’re photographing a car, I wouldn’t recommend having animal subject detection turned on. You may end up accidentally focusing on a bird! The examples are endless, but just remember to read your camera manual! It will explain what each setting does, and when to use them.
Using back-button focus setting with my Nikon Z8 (Run N Gun Photography)
10. Back-Button Focus
This is a camera setting I turn on as soon as I get a new camera. Back button focus allows us to separate the autofocus function from the shutter release button. Why, you ask? It can give for more precise focus control and sharper images, especially in dynamic shooting situations.
Final Thoughts: 10 Settings for Sharper Photos
Those are my top 10 camera settings for sharper photos. As you can see, it’s critical to know the basics of photography: Aperture, Shutter Speed and ISO, to get sharper photos. Additionally, you can leverage your camera settings for sharper photos. Shoot with intention. Don’t rush the shot. Take a deep breath and have confidence in yourself!
If you learned something today and enjoyed reading the blog (or watching the video tutorial), be sure to sign up for my exclusive newsletter bellow, Photography Insider! Also, don’t forget to Subscribe to my Photography YouTube Channel: Run N Gun Photography.