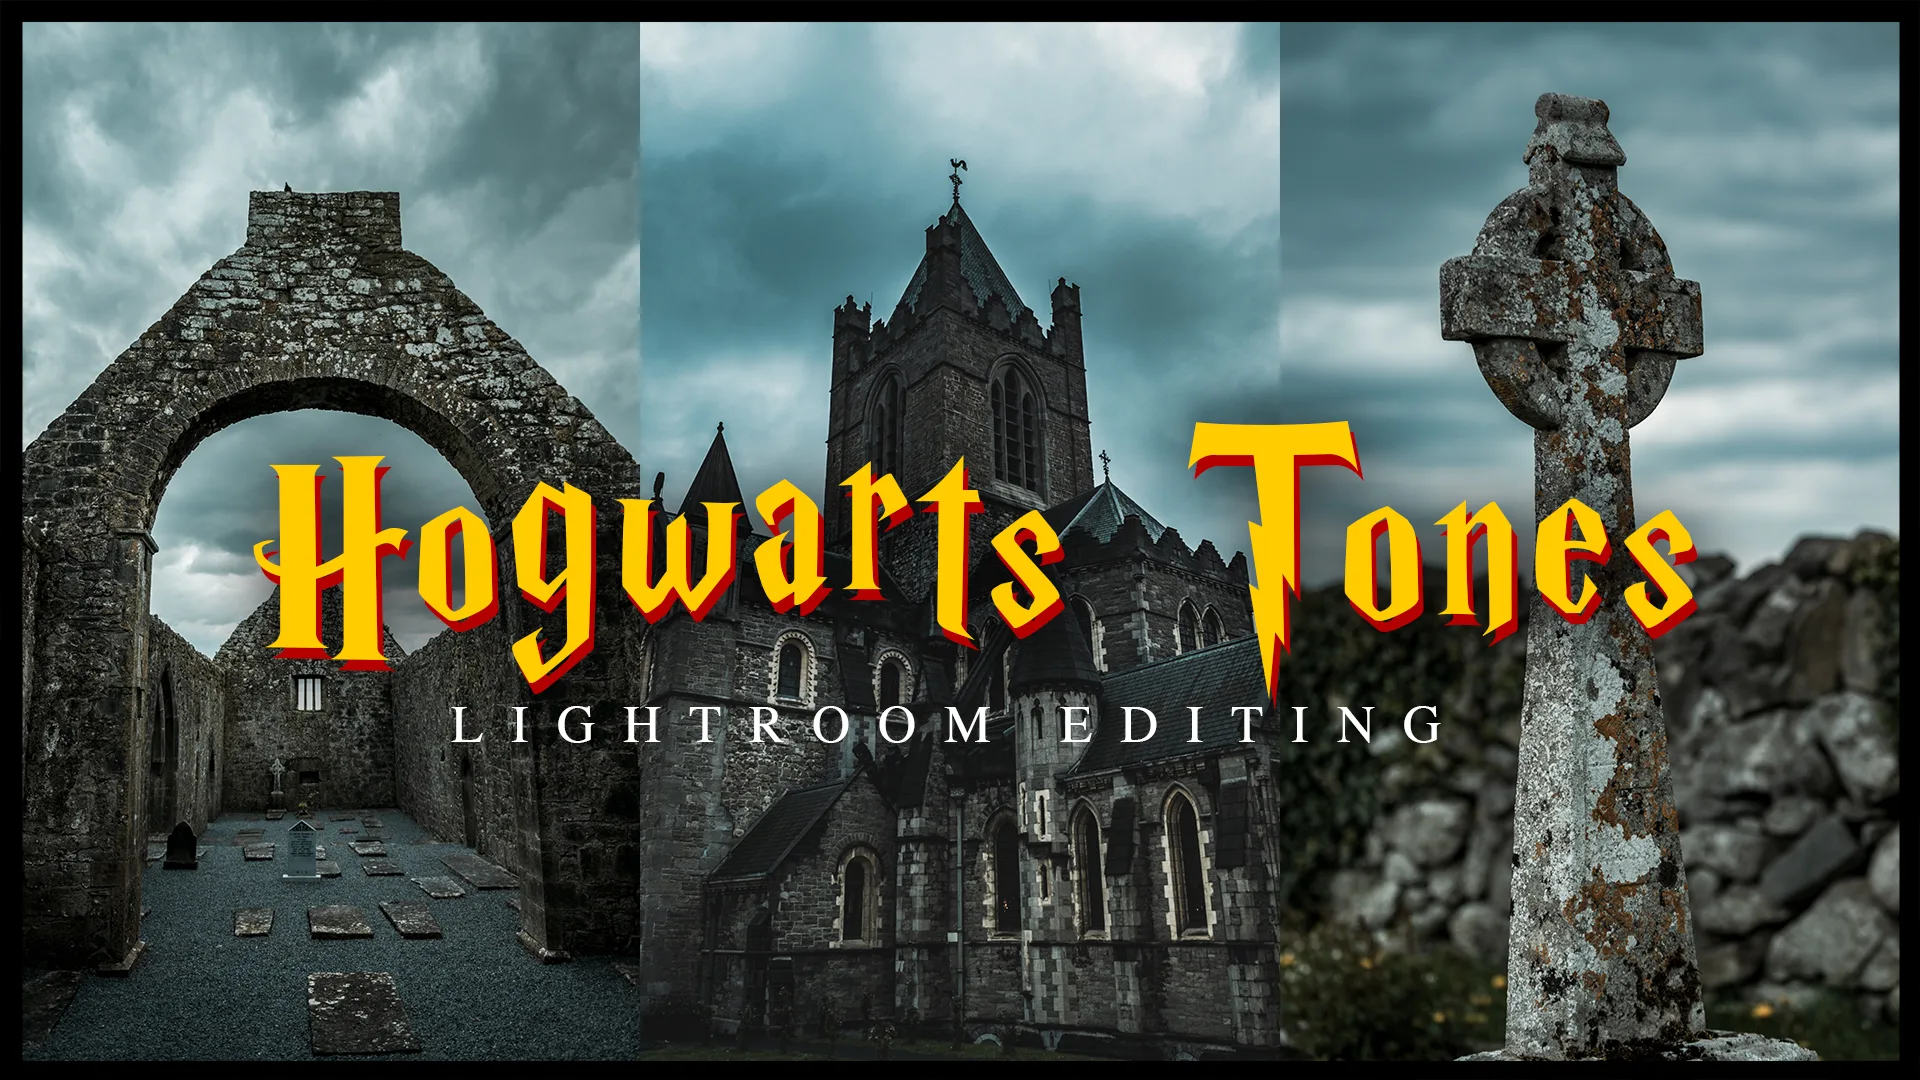
Hogwarts Tones: How to Edit Harry Potter Style in Lightroom
Post published:September 16, 2023
Reading time:3 mins read
Harry Potter Lightroom Editing
In this Lightroom editing tutorial I’m breaking down how to create the dark and moody color grading style from the Harry Potter films. If you’re familiar with these films, the color palette seems to get darker and cooler as the series goes on. With Halloween coming soon, I though this would be a fun Lightroom tutorial.
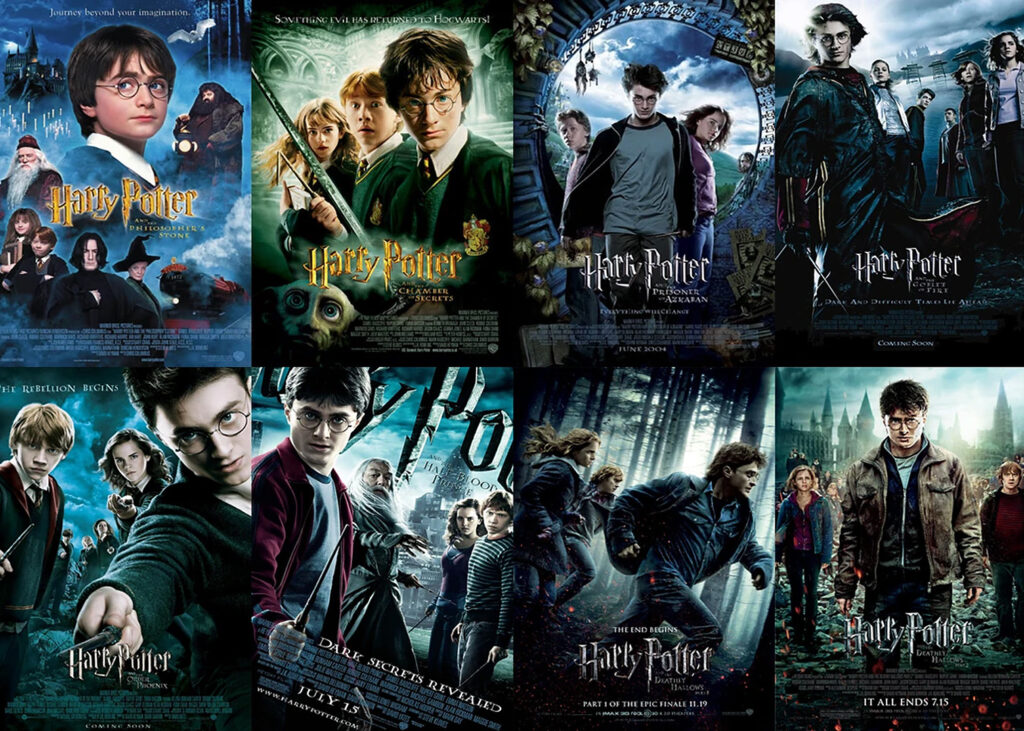
Harry Potter movie posters for inspiration.
Harry Potter and The Hunt for Hogwarts Tones
On my recent trip to Scotland, I had the opportunity to visit many castles, graveyards and other medieval ruins. A few of these locations were the actual inspiration for J.K. Rowling’s novels such as: Victoria Street, Greyfriars Kirkyard and the University of Glasgow. I also spent some time in Ireland at some spooky 15th century church ruins, which I also used in this edit. So without further ado, let’s open Lightroom and get editing!
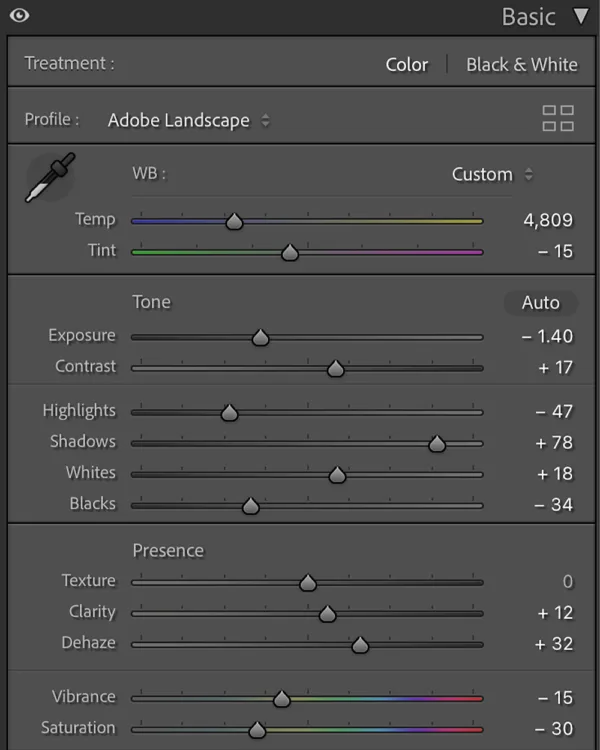
Image Calibration
I typically start my post processing by cropping and straightening my horizon. Then I jump right into the Calibration Tab in Lightroom. As I always say, a little goes a long way with calibration. Using the reference images above, I added some green tint to the shadows, desaturated the reds and pushed the blues towards cyan.
Toning the Photo
Toning your image will be specific to your scene. I highly recommend using a photo taken on a gloomy or overcast day. This will give you great flat lighting and soft shadows. I used the Landscape Profile to emphasize this look and cooled my white balance a touch.
Sometimes brining down your exposure slightly will add a stormy, moody look. It also helped to turn down my saturation and vibrance a good amount. A hint of dehaze was the icing on the cake.
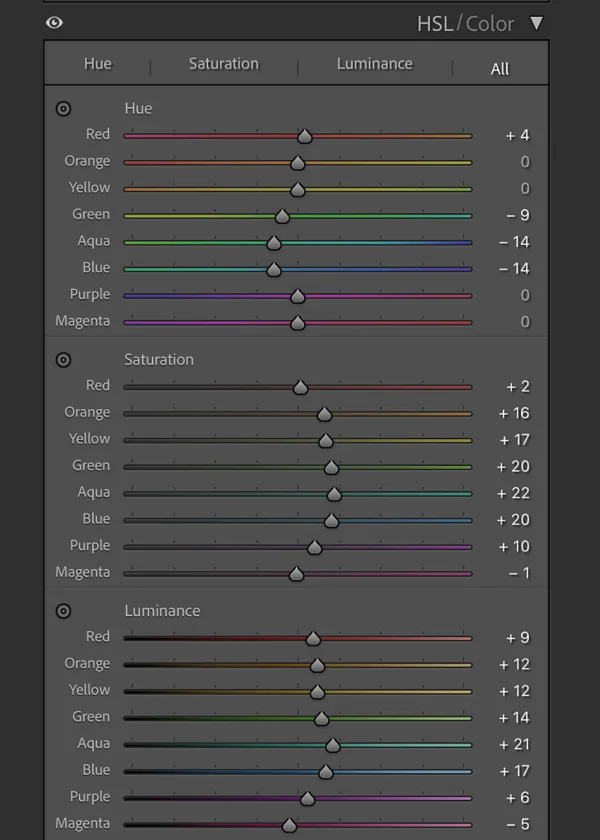
HSL
After toning the image, it’s time to do some final color correction to our Harry Potter inspired edit. To reduce banding between hues by pushing our sliders too far, I’ve been utilizing a technique you can see in the example below. Instead of pushing one slider to the max, I create a bell curve using most, if not all of the sliders.
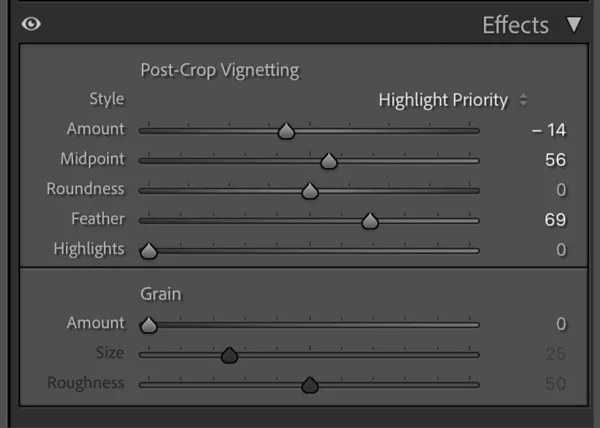
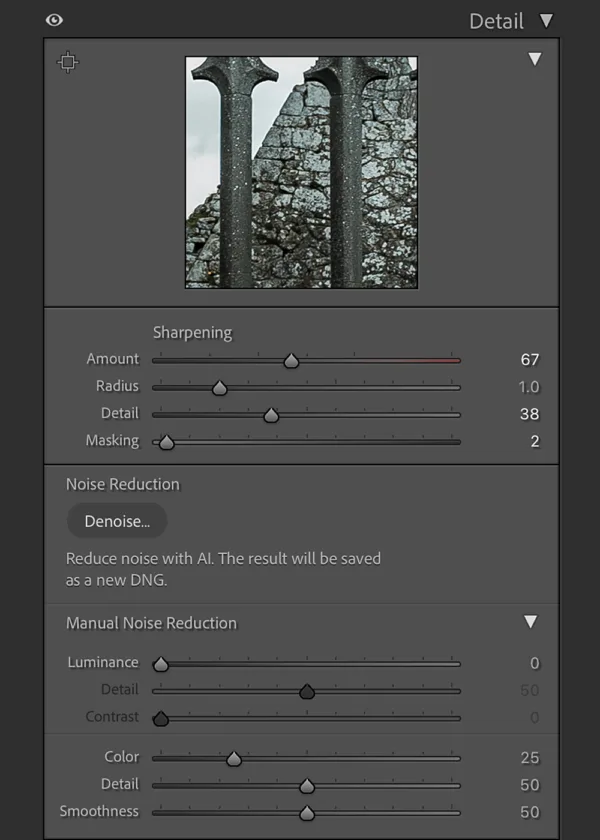
Vignette and Details
To wrap up this Lightroom Editing tutorial, we’ll add a vignette to our photo and touch up the details. A slightly heavy vignette really does the trick for an edit like this. Be sure to sharpen your final image and do a touch of noise reduction if you really pushed your image far in the toning stage.
I’ve started to play with Lightroom AI Denoise and I am quite impressed! It creates a new DNG file and using Denoise along with Enhance can create some very detailed final prints!
Harry Potter Lightroom Editing Tutorial Conclusion
I sincerely hope you enjoyed this Lightroom Editing tutorial to recreate the dark, moody tones from the Harry Potter film series. I also hope you learned a thing or two about Lightroom.
Don’t forget to browse my Official Shop for lots of Dark and Moody Lightroom Presets and LUTs. Be sure to subscribe to my news letters down below for new tutorials and preset drops! Also Subscribing to my Run N Gun Channel is another great way to keep updated on new tutorials!


Did you enjoy this Harry Potter Style Lightroom Editing Tutorial? Let me know by leaving a comment, or a suggestion for a new tutorial!