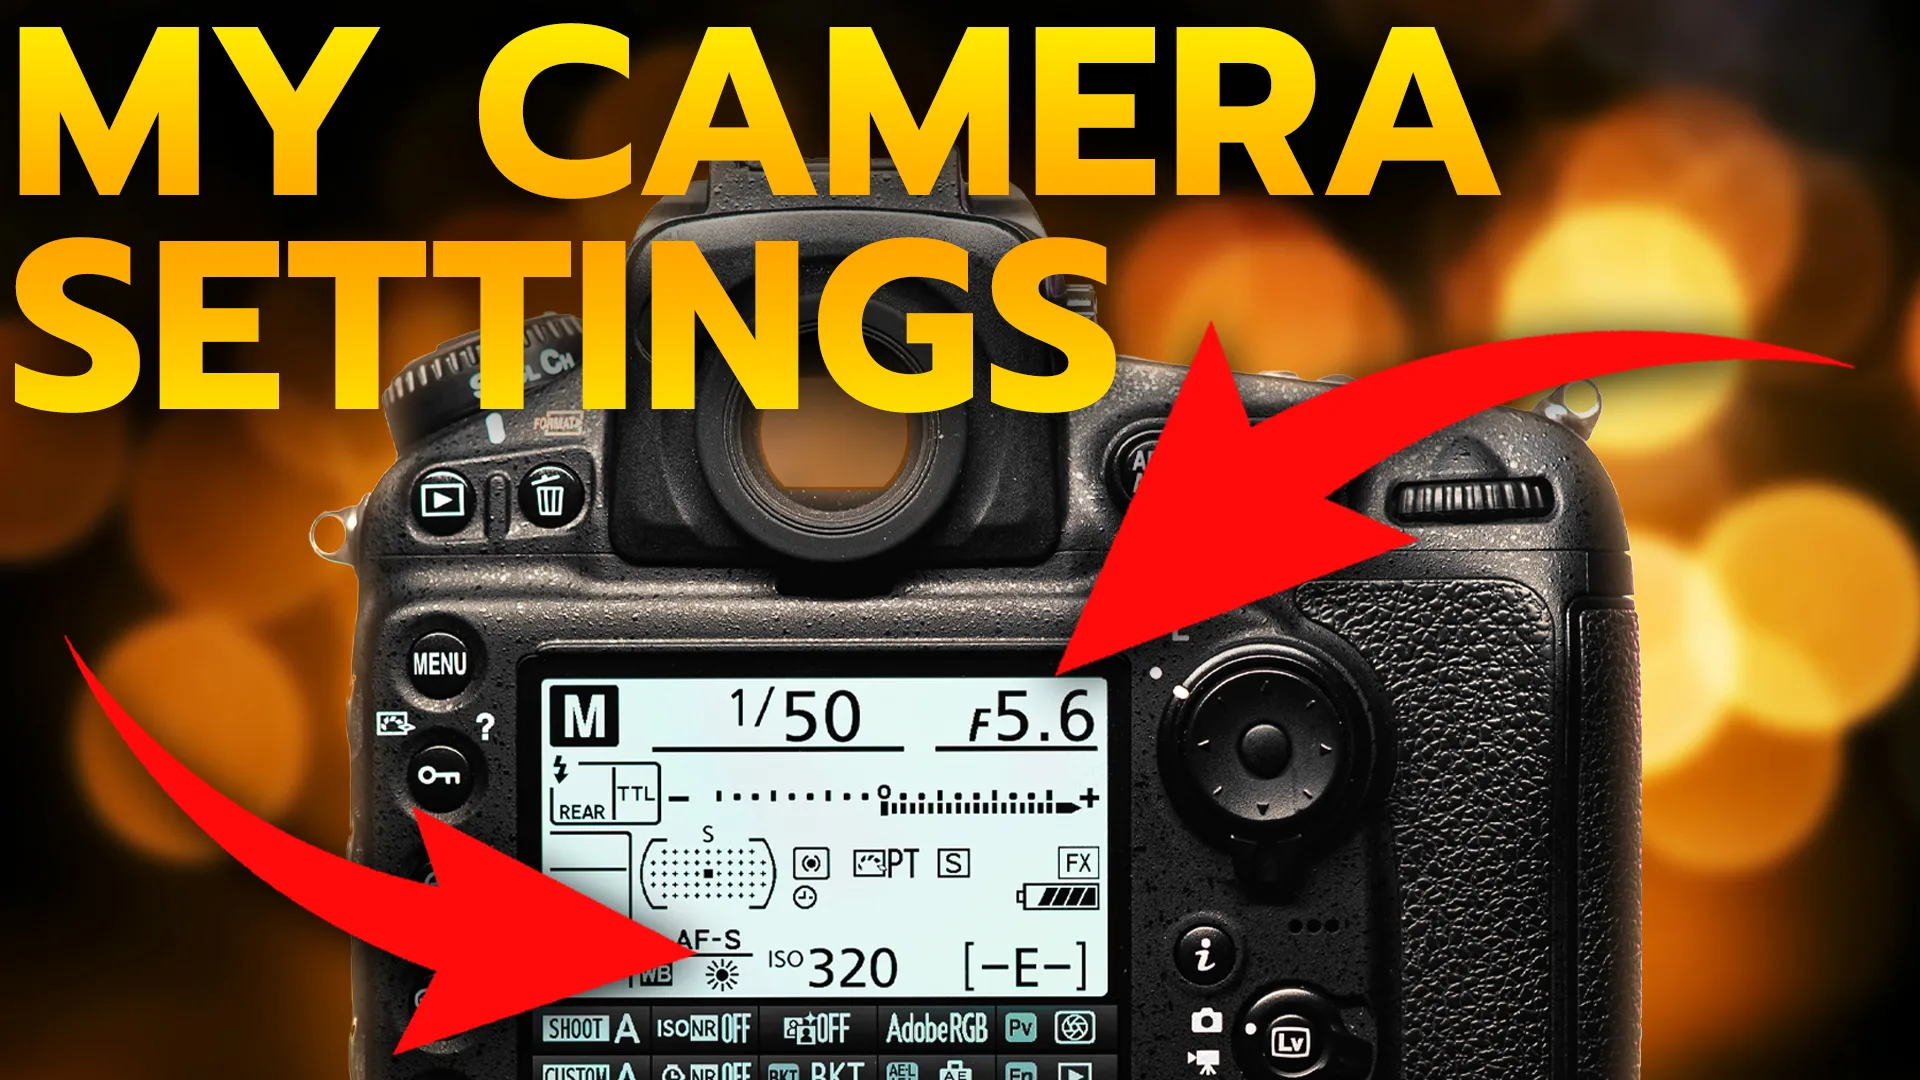
The most-asked question I receive (by far) as a photographer is: “What camera settings did you use for that photo?” The second most is probably: “What are the best camera settings to use?” Unfortunately, there are no magic camera settings that will work in every scenario. In fact, even if you use another photographer’s exact settings, your photograph will look much different! That’s because lighting conditions, weather, camera bodies, lenses, angles, etc., are all variables which need to be considered.
However, I do have some good news! The solution is learning the formula for selecting the best settings on your own! I’m going to share my methodology and the mental list I run through every time I take a photo. By then end of this article, you should feel confident in selecting your own camera settings. Let’s get into it!
My Camera Settings
Identify a Subject
The first critical step to selecting the best camera settings is to identify your subject! Most new photographers skip this step, making the entire process so much more difficult. Why is it so important? Well, because your subject is the most important part of the photograph, and we’ll be exposing for our subject.
If we don’t identify our photo’s subject we’ll constantly be guessing at our exposure values. What’s your subject? Is it a tree, a mountain range, your car, a person, that building, this frog, etc.? Once we select our subject we can select the setting to best photograph it.
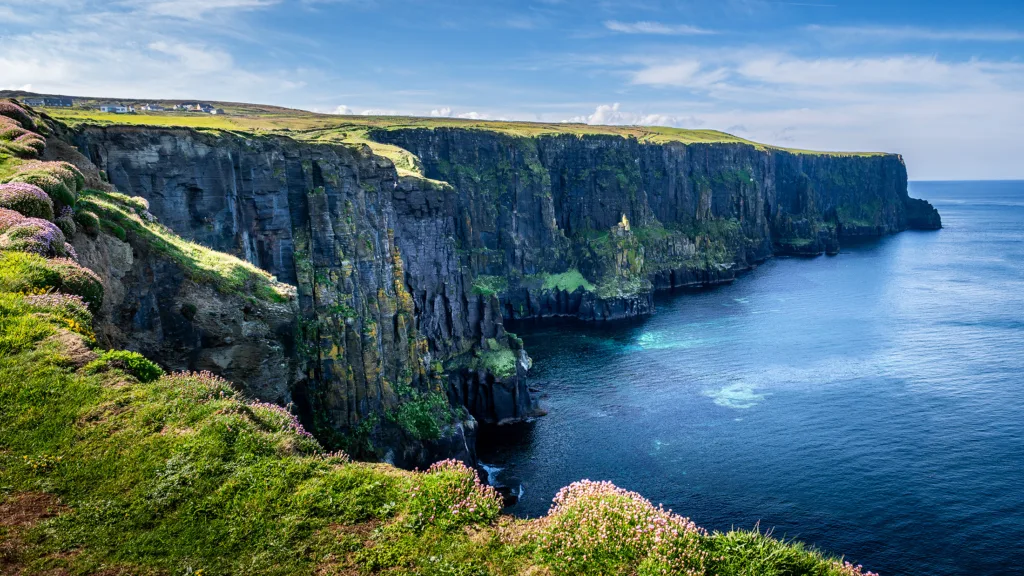
I captured the Cliffs of Moher with a closed-down aperture for deep depth of field. (Run N Gun Photography)
Setting the Aperture
I always start with aperture. Also, ignore all the rest of your settings for now, and focus solely on your aperture. The aperture is located in your lens, and adjusting it allows more or less light to reach your camera’s sensor. It controls two aspects of the photograph: 1) Depth of Field and 2) Exposure.
Depth of field (DoF) describes how much of your image is in focus. If you would like a sharp subject and a blurry background, such as a portrait, use an aperture value such as f/1.8, f/2, or f/2.8. Small aperture numbers denote a large aperture and shallow depth of field, while larger aperture numbers will close your aperture and give you a deeper DoF.
So, if I want and entire landscape sharp and in focus, I’d aim for a deeper DoF, using an aperture value of say f/8, f/16 or even f/22. Remember, opening your aperture allows more light in, while closing your aperture allows less light into your camera. We’ll talk about this again soon.
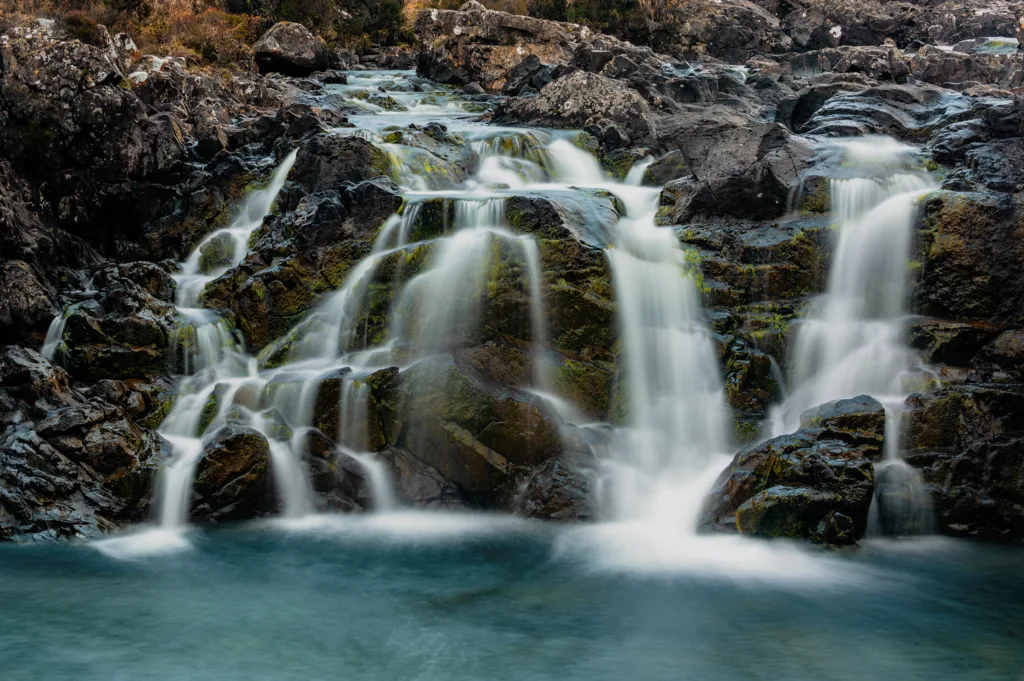
A slow shutter speed blurred the water's motion in this Scottish Highlands waterfall. (Run N Gun Photography)
Picking a Shutter Speed
With our aperture set, it’s time to pick the best shutter speed. Your shutter is located inside your camera and allows light into your camera for a limited amount of time. That time is called your shutter speed! Shutter speed controls two aspects of the photo: 1) Motion Blur and 2) Exposure. To find the best shutter speed setting, we need to refer again to our subject. How fast is our subject moving?
If you’re photographing planes, trains or automobiles, you’ll likely need a fast shutter speed, because the subject matter is fast! You might select a shutter speed of 1/500th, 1/1,000 or even 1/4000th of a second to ensure your subject is sharp!
If you’re capturing a slower moving subject like a sloth, a building or a mountain, you can get away with using slower shutter speeds. The only limit how slow your shutter can be, is how shaky you are! Of course, that’s why photographers use tripods, to get sharp images! Remember that your body can introduce motion blur (camera shake) into your photo if your shutter speed is too low!
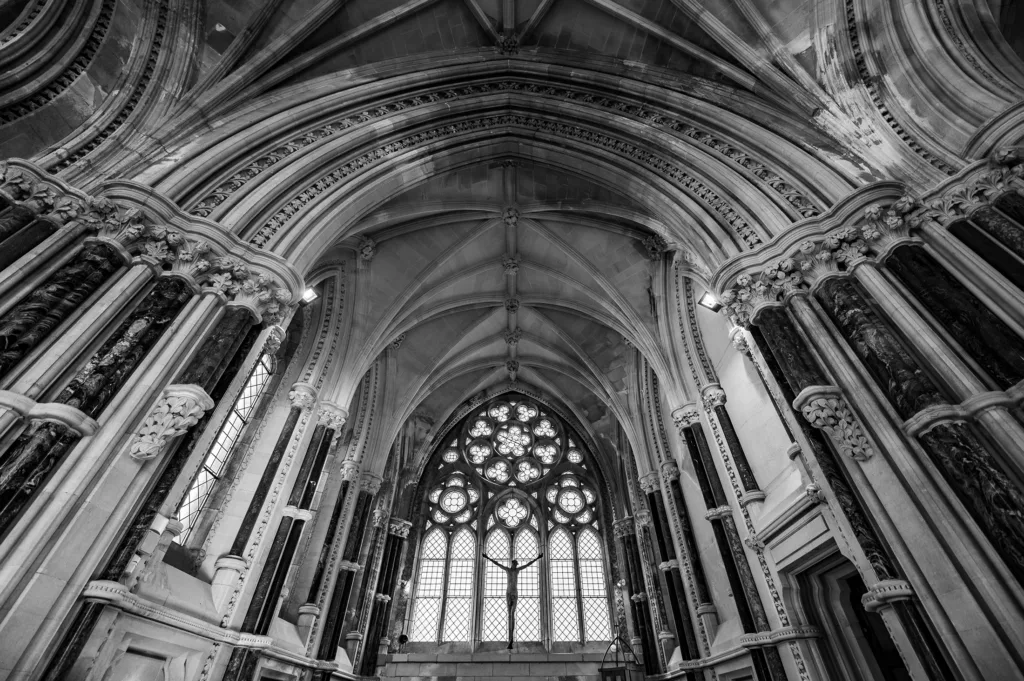
Church at Kylemore Abbey in Ireland. Balanced camera settings for a proper exposure. (Run N Gun Photography)
Properly Use Your ISO
Your last setting should always be your ISO. Aperture comes first, shutter speed is second, and ISO will be last. Your ISO is your final exposure adjustment in the Exposure Triangle. Your ISO controls two parts of the photograph: 1) Brightness and 2) Quality.
After setting your exposure and shutter speed, your image may be too bright or too dark. So, ISO is how we fix that! If your image is too dark, turn your ISO up. Conversely, if your image is too bright, then turn your ISO lower. However, be careful if you turn your ISO value too high. Also, ISO is also directly related to the quality of your photograph. High ISOs cause noise, which can degrade the quality of your photos. This is especially true when shooting JPG and not RAW.
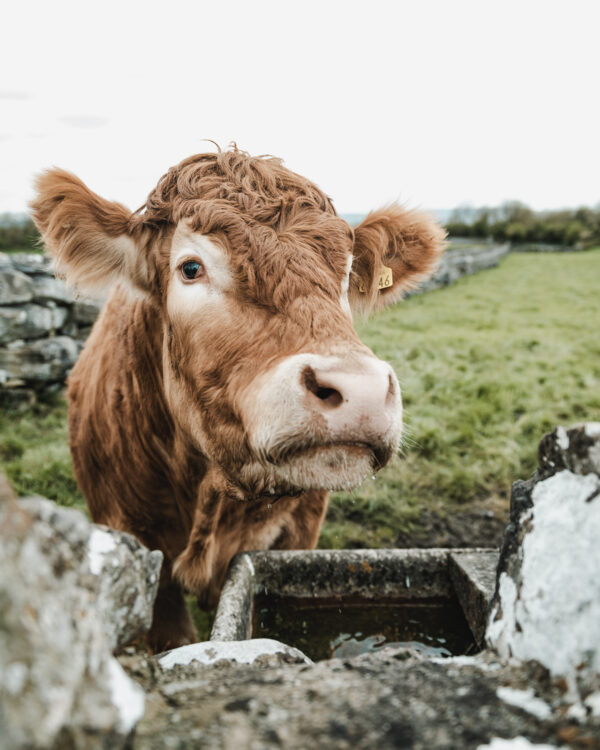
This Irish cow, grazing the ruins of an old abby, is the subject of the photograph. (Run N Gun Photography)
Choosing the Best Camera Settings
Choosing the best settings comes down to balance. You may get to final step of adjusting your aperture to find out that your image is still too bright or dark. Now, you’ll return to your aperture or shutter speed to see if you can adjust them slightly for a proper exposure. Sometimes our artistic vision may be limited by the available natural light. In future lessons, we’ll discuss techniques and gear for adding artificial light to our scenes.
If you learned something from this Photography 101 lesson, be sure to Subscribe to my YouTube Channel: Run N Gun Photography. So until next time, get out and go shoot!